This particular hub was originally owned by Thorin (who I know vaguely through the MBTC). Thorin gave it to John Harland, but John wasn’t going to use it because he doesn’t like the uneven gear ratios (more on that to come later). The idea of pulling it apart came up at another swap meet, when I saw an 8 speed for sale, and suggested buying it. John told me about the old internals that he’d got from Thorin.
And that’s how this hub came to be donated to Science.
before you continue
The usual disclaimer: There are other resources on the internet which discuss the basic principles of hub gears, so I won’t go over the very basics here. Wikipedia is a very good place to start:
https://en.wikipedia.org/wiki/Hub_gear
Sheldon Brown also covers a lot of info on the care and maintenance of the Nexus 8 speed (but doesn’t go into how the hub works)
https://www.sheldonbrown.com/nexus8.shtml
In essence, you should be familiar with how a typical 3 speed hub works; and also with the effect of compound planet gears to achieve different ratios (eg Sturmey Archer 5 speeds).
Initial hurdles
John brought his condemned hub around to my place, and we partially pulled it apart. We got the main circlip off the axle (without losing it for a change) and then separated the axle assembly from the bit that’s referred to as “internal assembly” on Shimano docs, with a single part number.
Despite the Shimano docs, I’m quite sure that they don’t just dig them out of the ground like that, so logically it must be possible to disassemble it further. However, it seemed like I’d come to a dead end with it: I couldn’t separate the gear ring from the planet cage on the sprocket end on the one hand. On the other end, I could take of a snap ring and remove the planet gear shafts, but I still couldn’t get the planet gears out because the gear ring was holding them in place. In the end John went home and kindly let me hang onto the hub bits for further study.
I couldn’t figure out how it had been put together, and was starting to think (rather cynically) that maybe the planet cage in the internal assembly consisted of two parts somehow pressed together; the better to defy intervention by DIY mechanics like me.
Until, after about a week of puzzling over it, I came across this blog post: http://rethinktheworld.blogspot.com.au/2012/05/on-beautiful-day-in-2011-when-i-visited.html
Now, that guy has a different version of Shimano 8 speed, because some of the parts have different shapes, but his post gave me the critical detail that I needed to know: He had removed two snap rings, one from the planet gear shafts, and another from inside the ring gear. I had another look at mine, and sure enough there was a snap ring around the planet cage on the sprocket/clutch end (it was pretty hard to see because of the grease all around it). The reason I couldn’t remove the ring gear was because I had to remove the snap ring first.
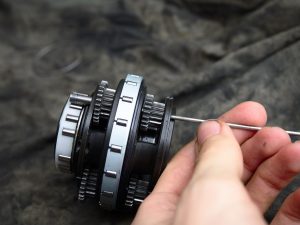
That turned out easier said than done. The wretched thing would slip sideways whenever I tried to wedge a screwdriver under it. I tried holding it still with my thumb, which meant I could pry it up a bit, but it would snap closed again before I could wedge anything under it to pry it off. In the end, I managed to remove it by holding it with my thumb, prying it up with a screwdriver in my other hand, and placing an old spoke (held in my mouth) in the gap to keep it open so that I could lever it off.
Argh, snaprings are the connector from hell (and unfortunately Shimano seem rather fond of the things, as their hubs are full of them).
Anyway, end rant. I was very pleased to have finally solved the puzzle.
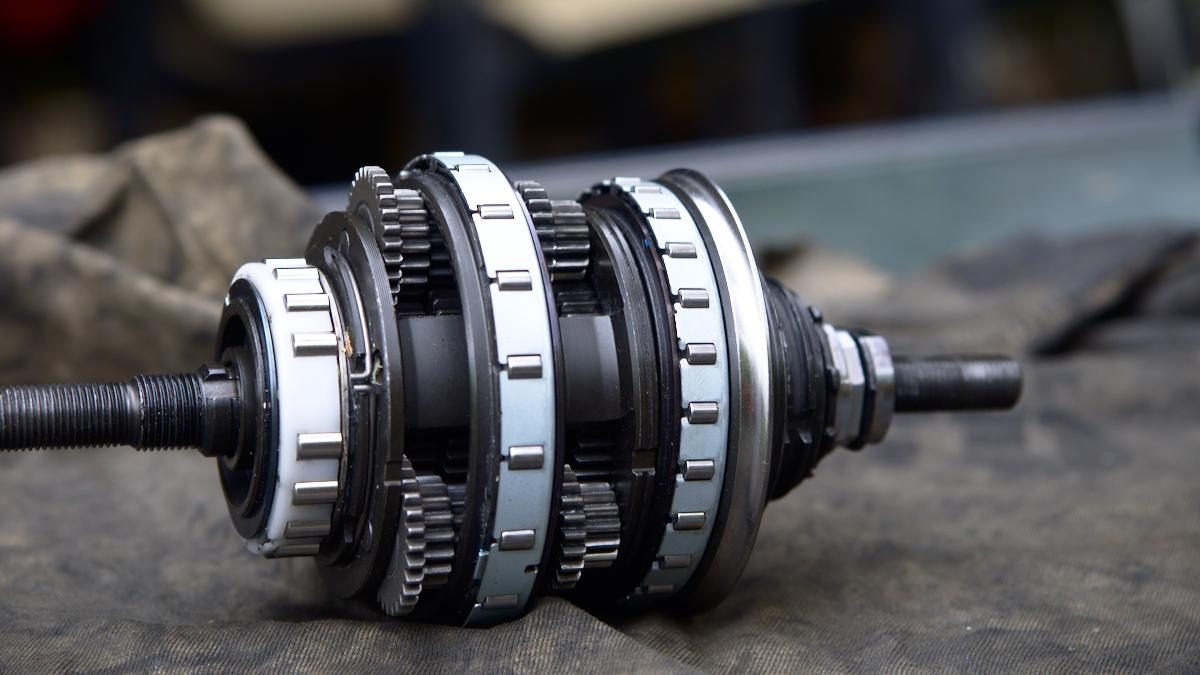
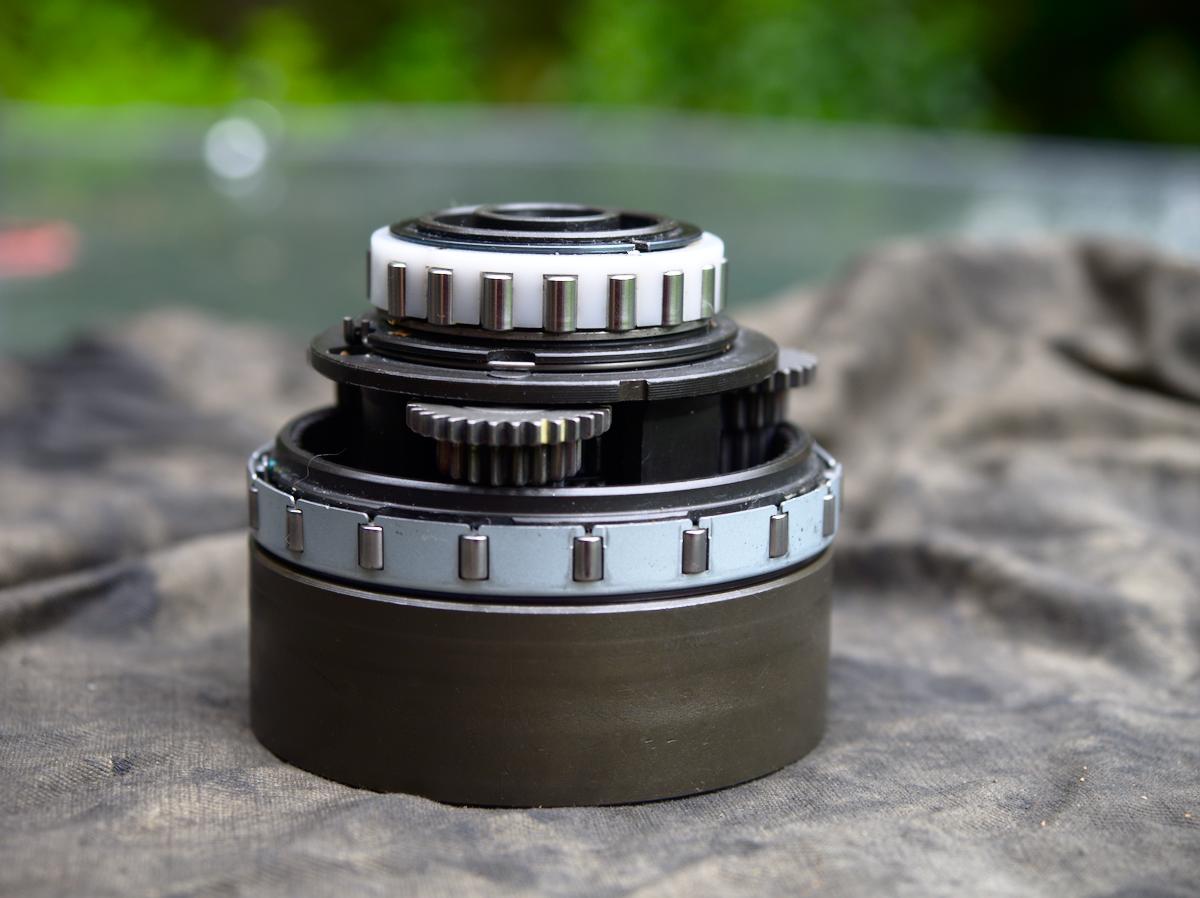
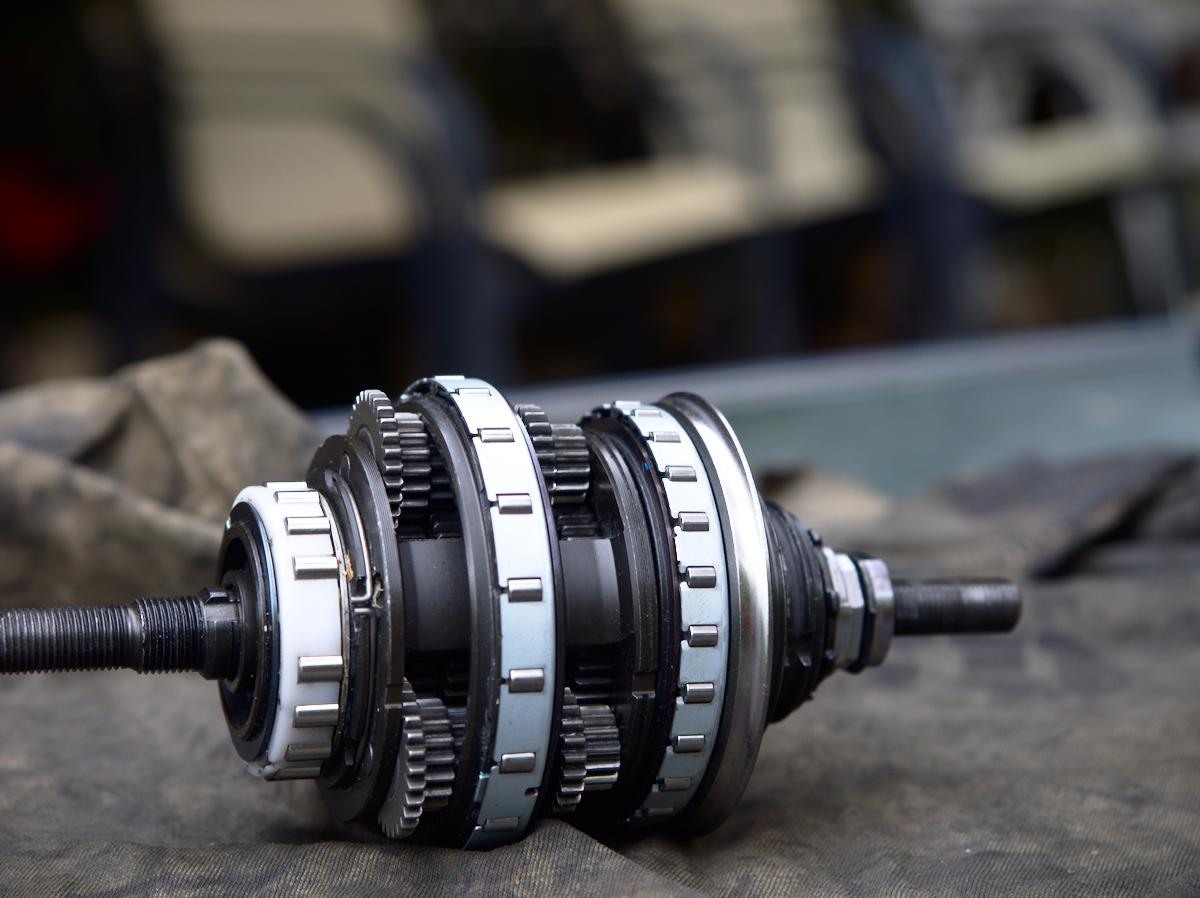
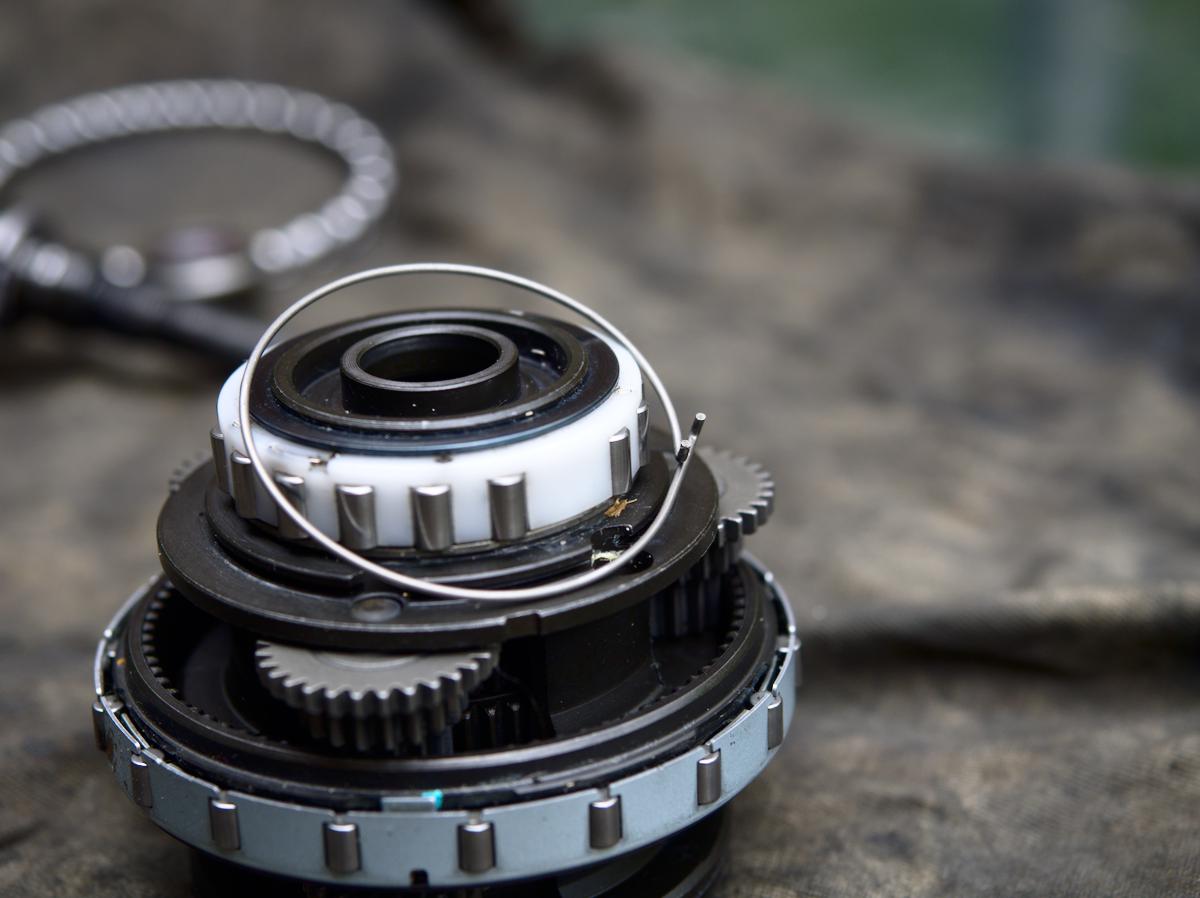
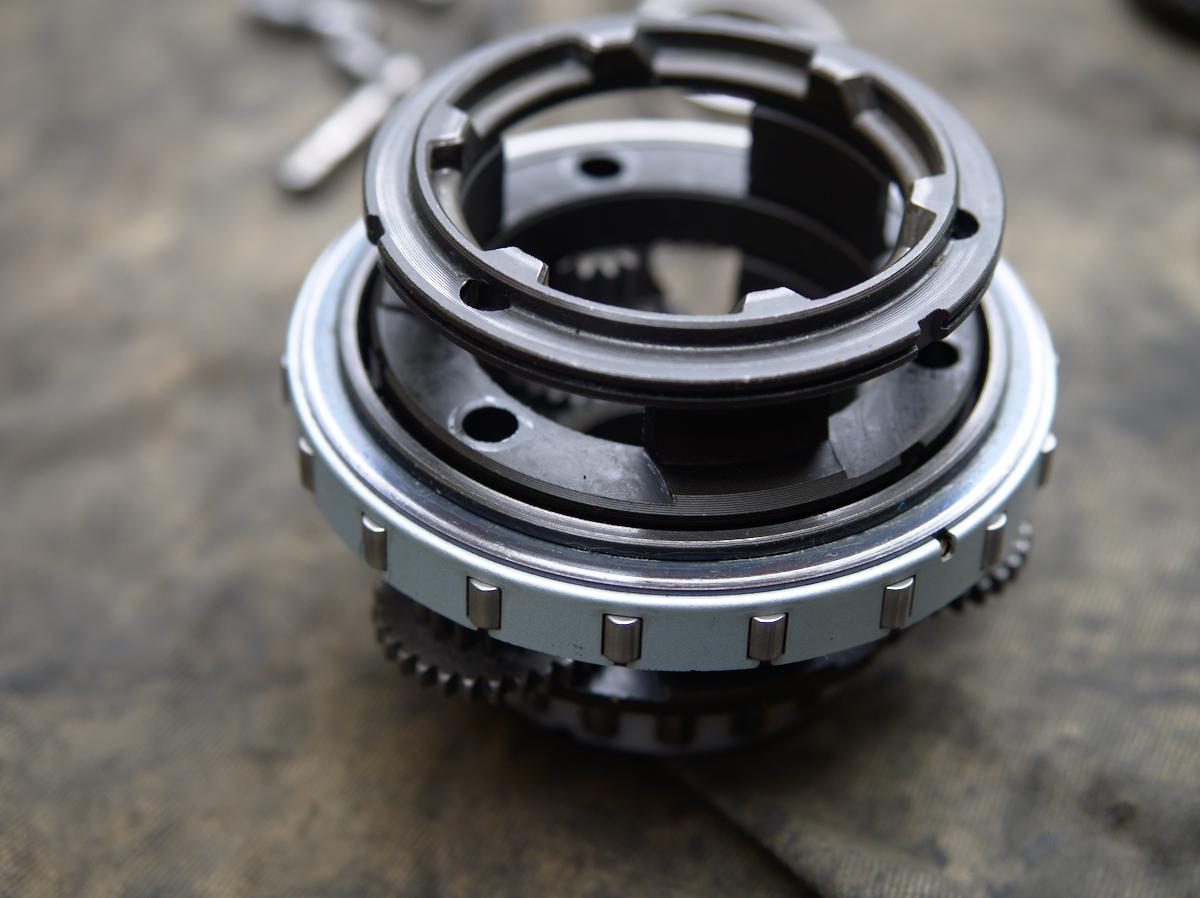
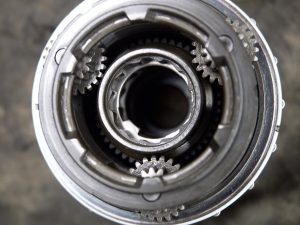
Complete internals, cleaned of grease.
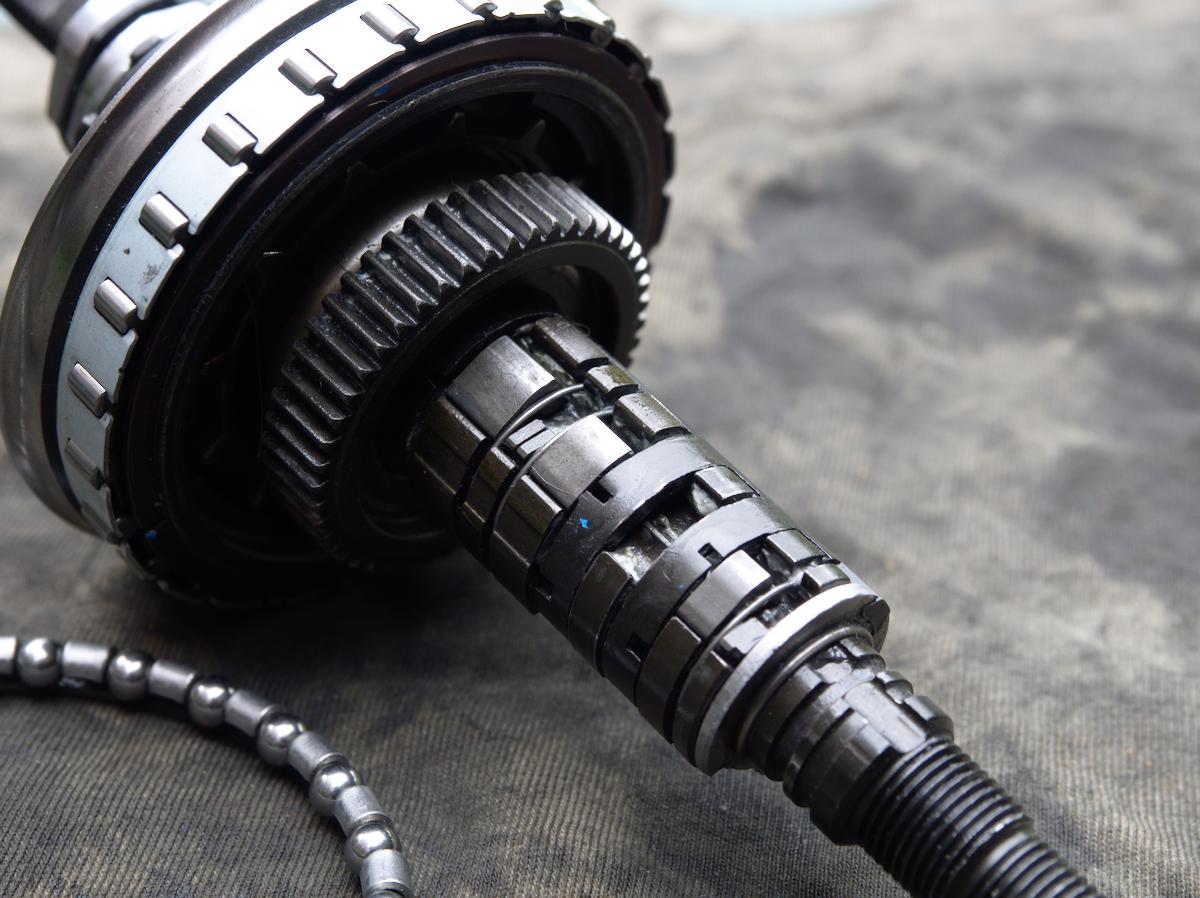
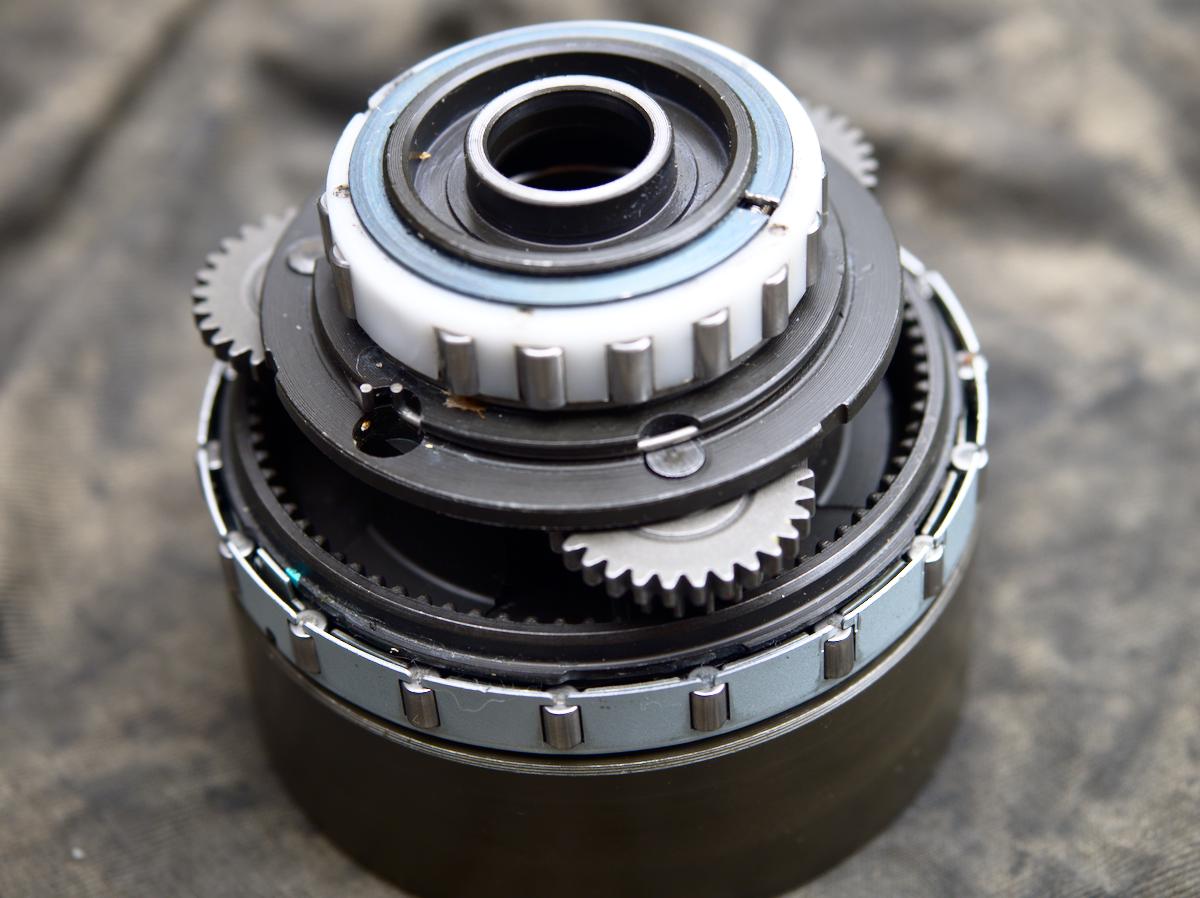
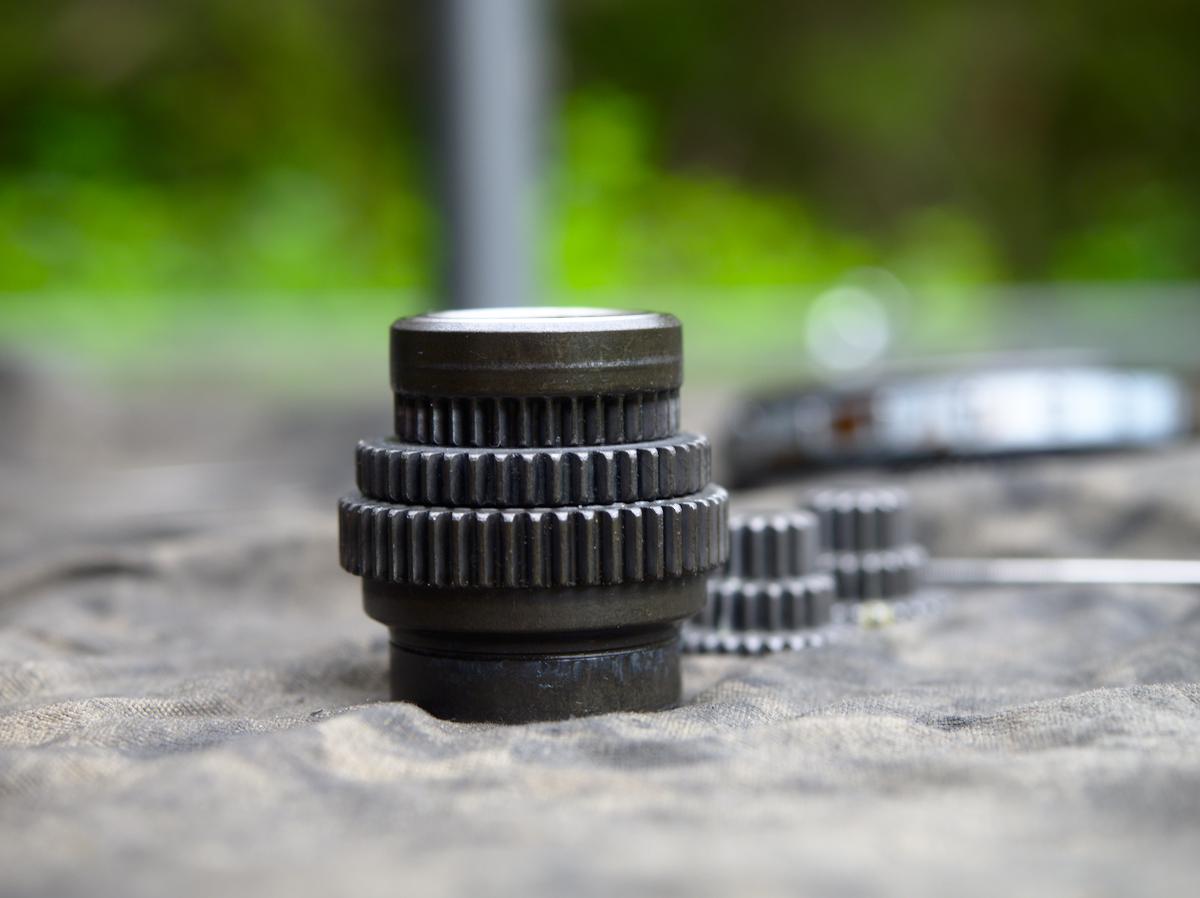
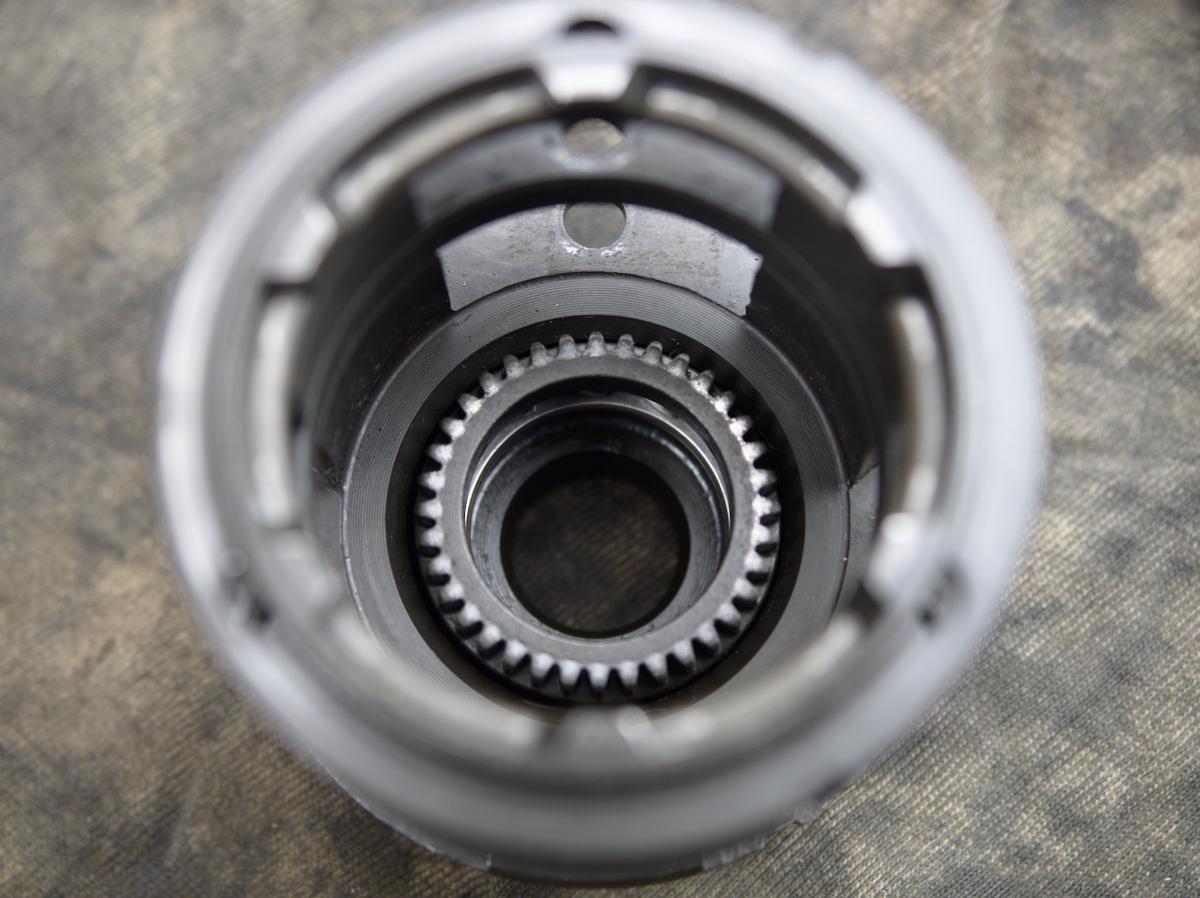
Close up of the axle unit. Like the Alfine 11, this hub has pawls that are controlled by a band that moves around the axle. It’s difficult to get a clear shot of the detail of it though.
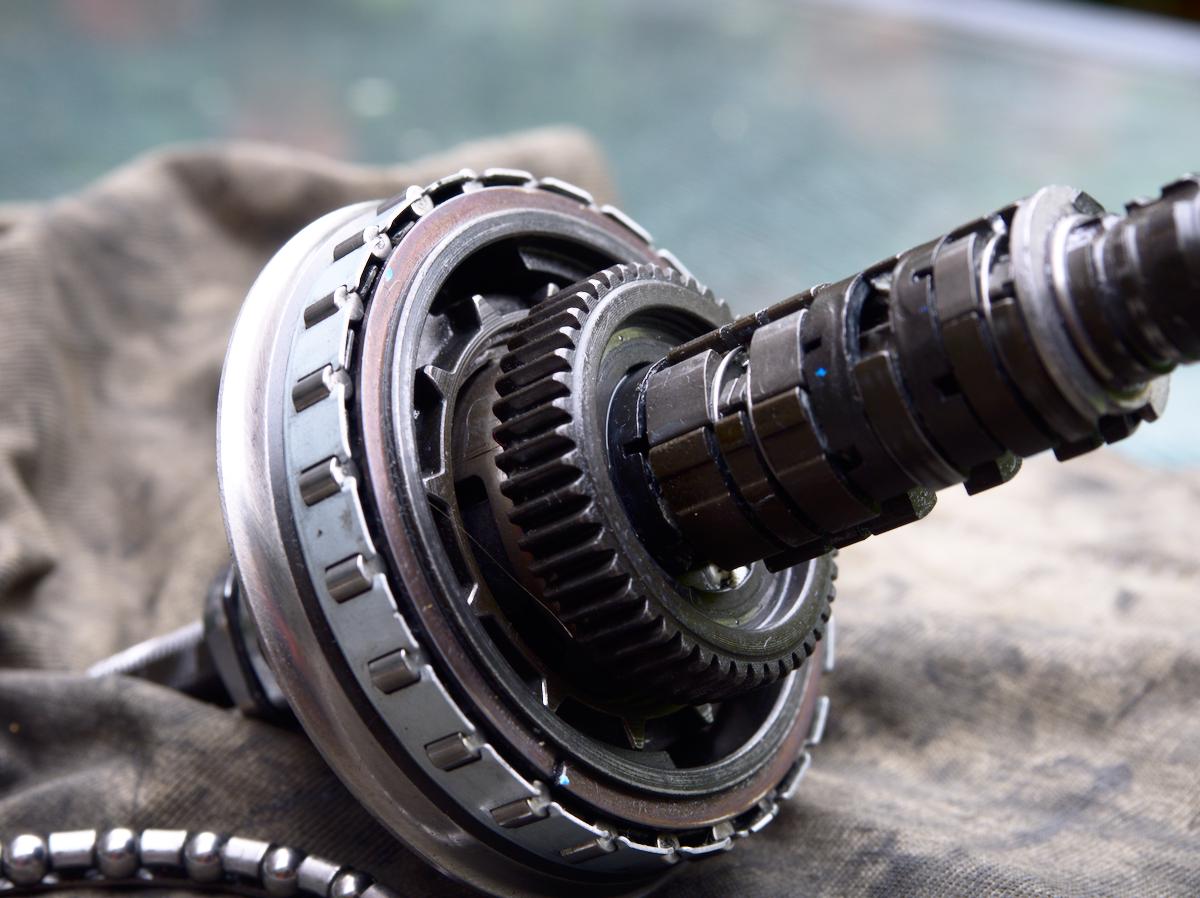
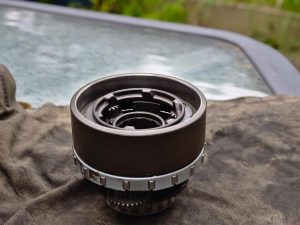
Another look at the axle unit.
This big lump is a single part number in the Shimano docs
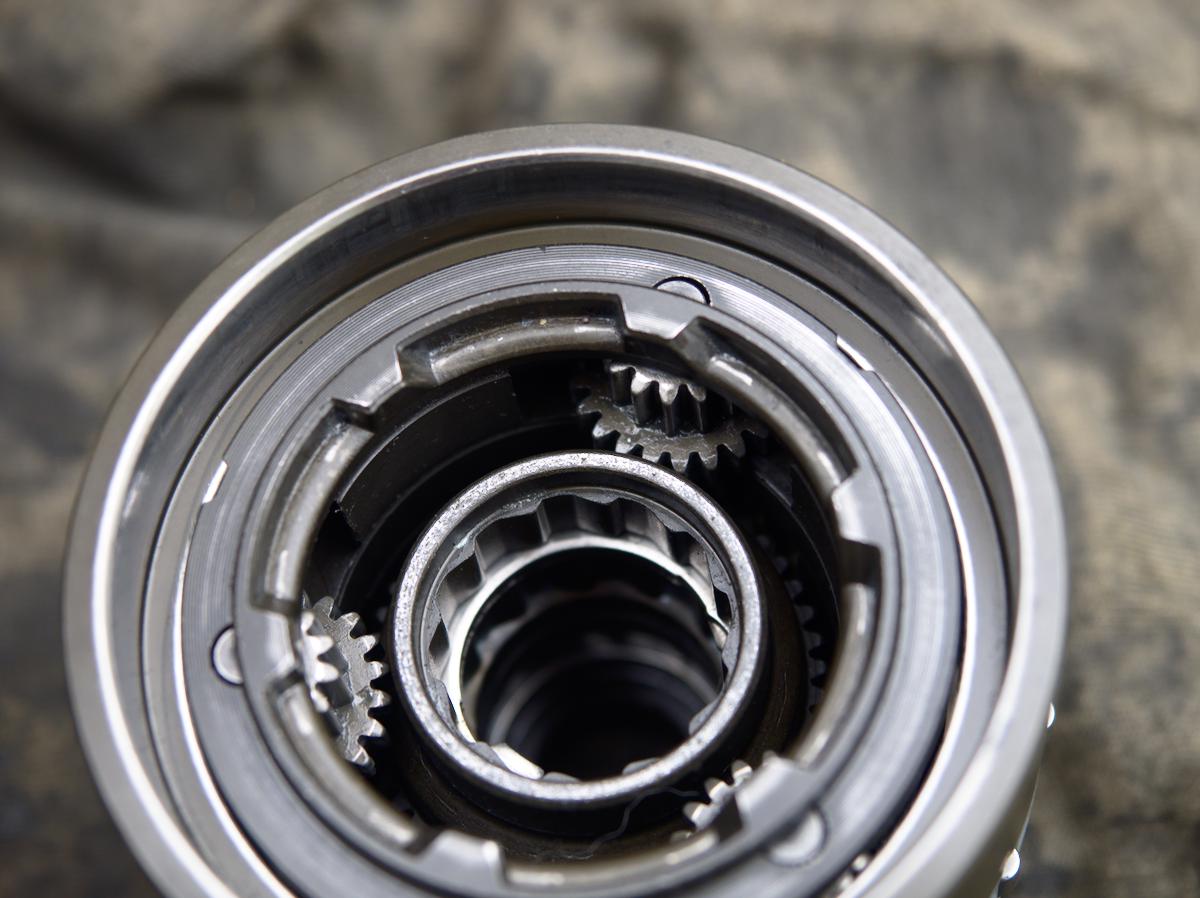
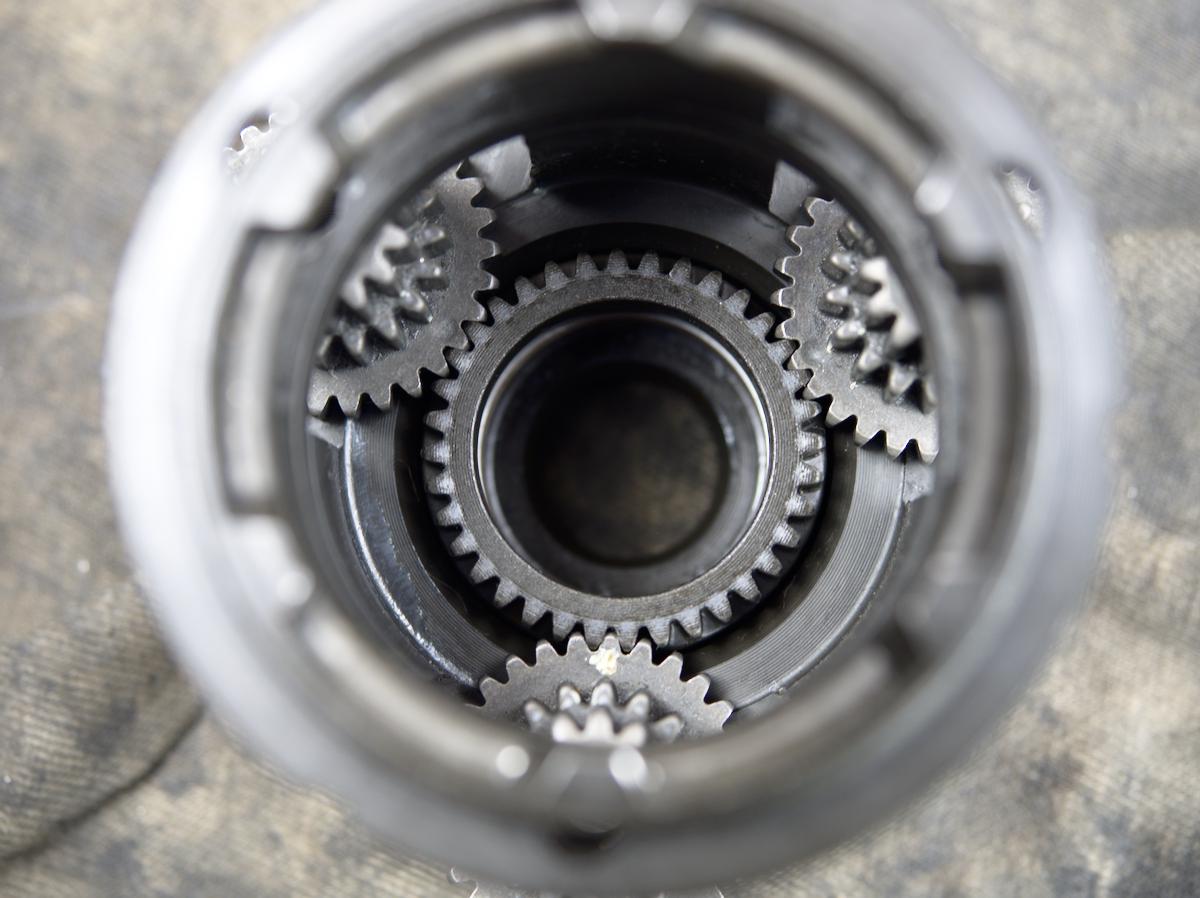
Ratchets inside one of the three step-up sun gears. Note that because the planet cage is input and the gear ring is output, the sun gear will try to rotate forwards (clockwise in the picture), so the pawl faces backwards (preventing the sun gear moving forwards).
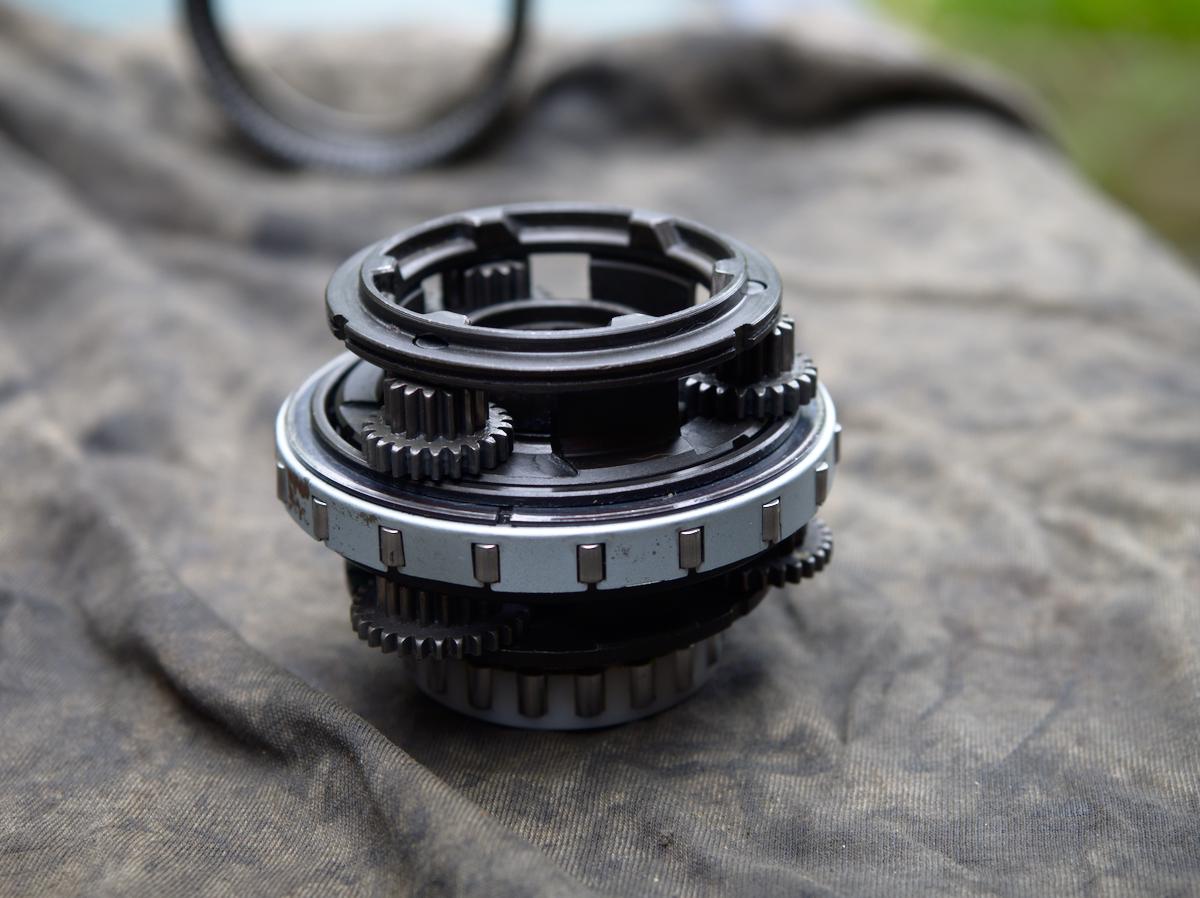
You’re looking at roller clutches, not roller bearings. They allow the hub to overrun them, just like a freewheel that we’re all familiar with.

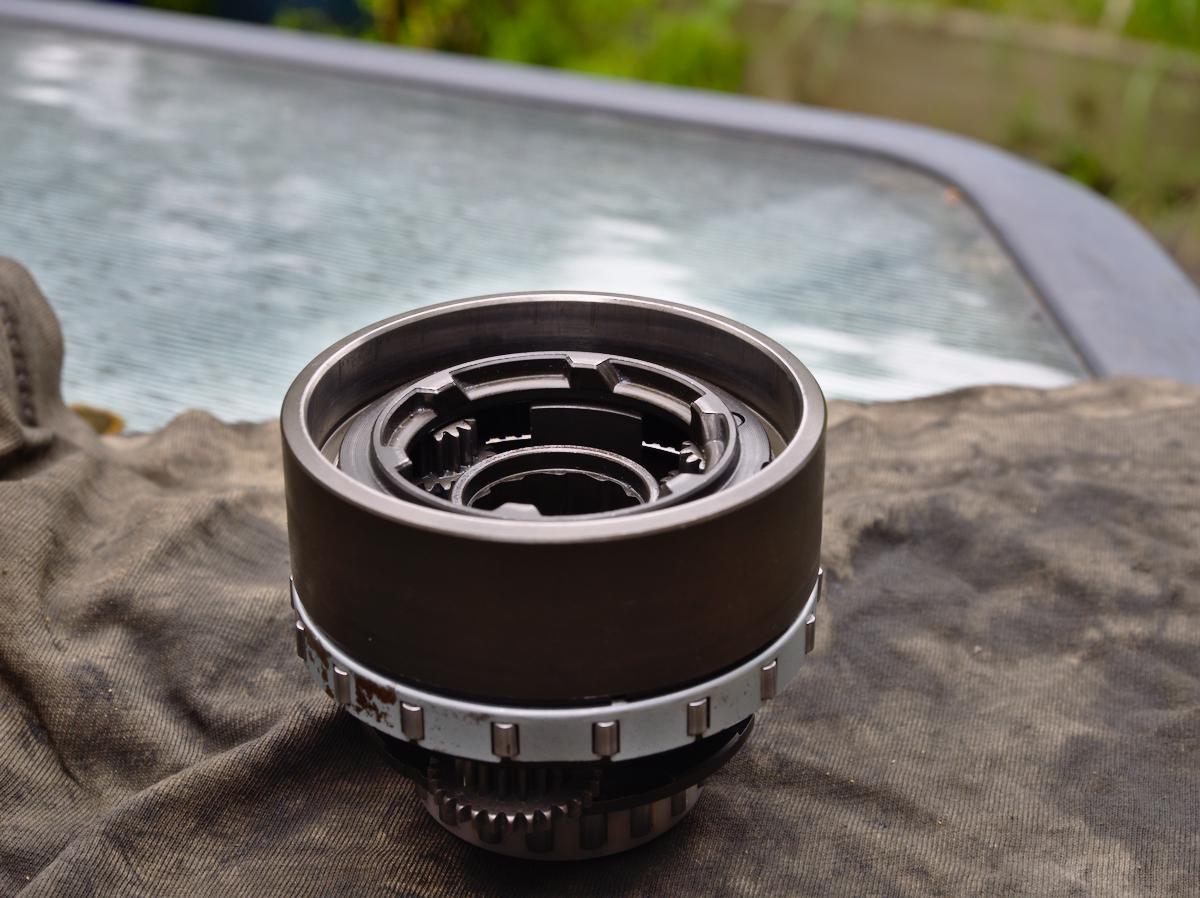
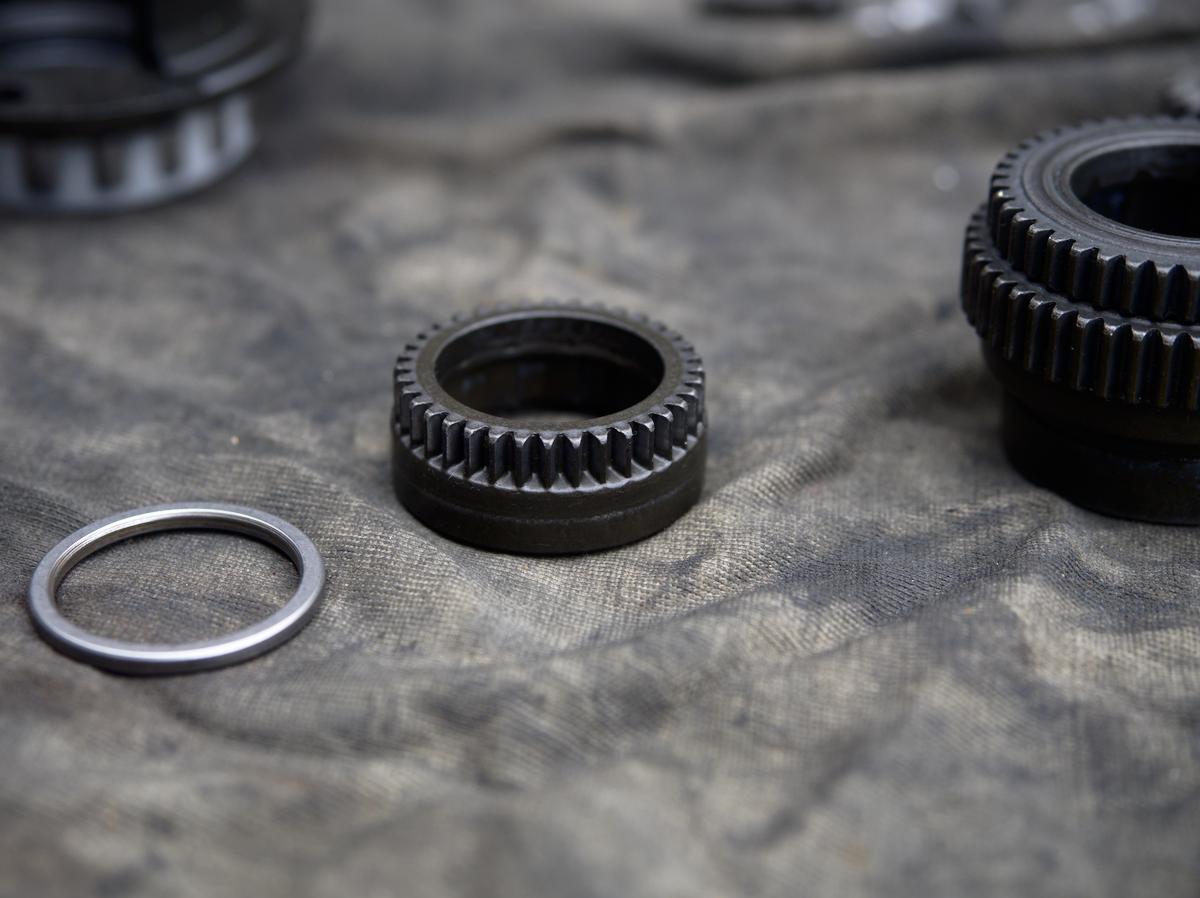
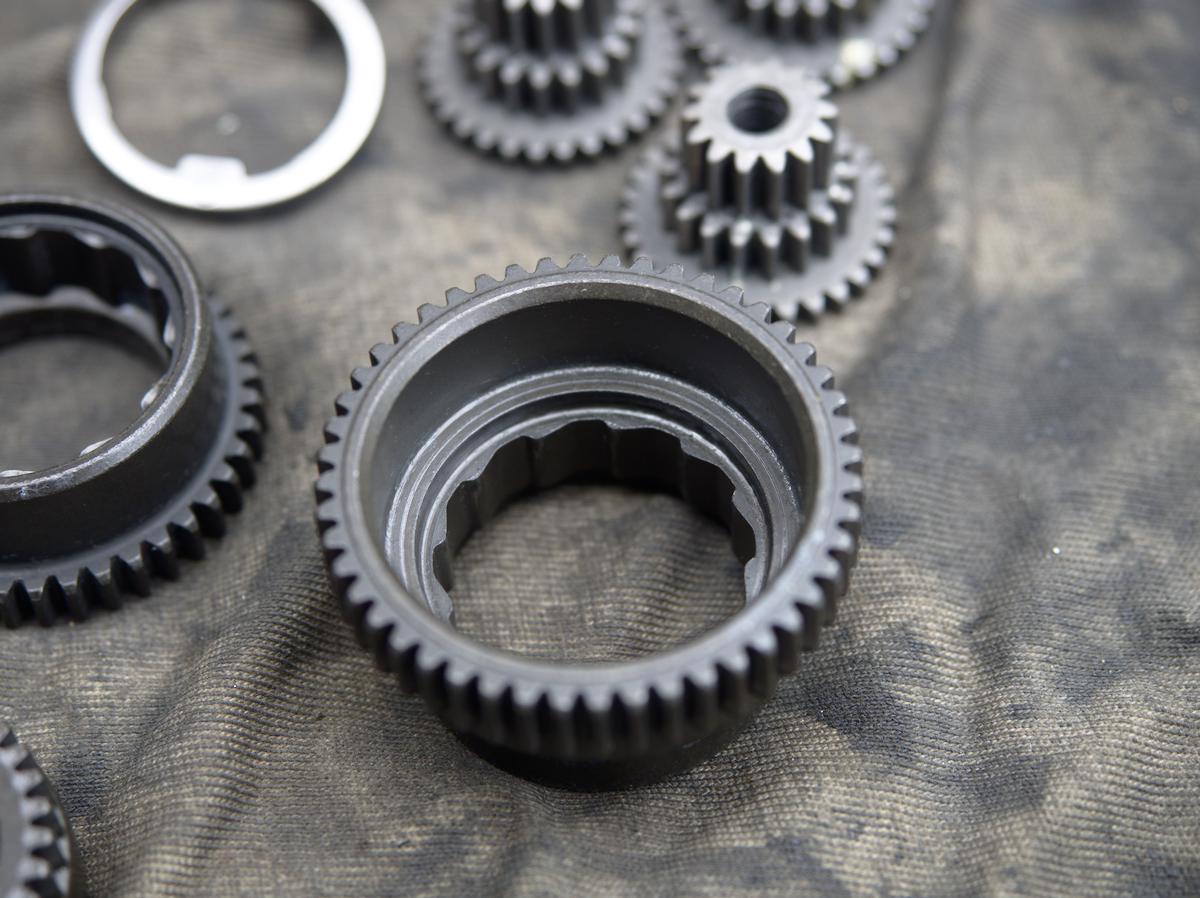
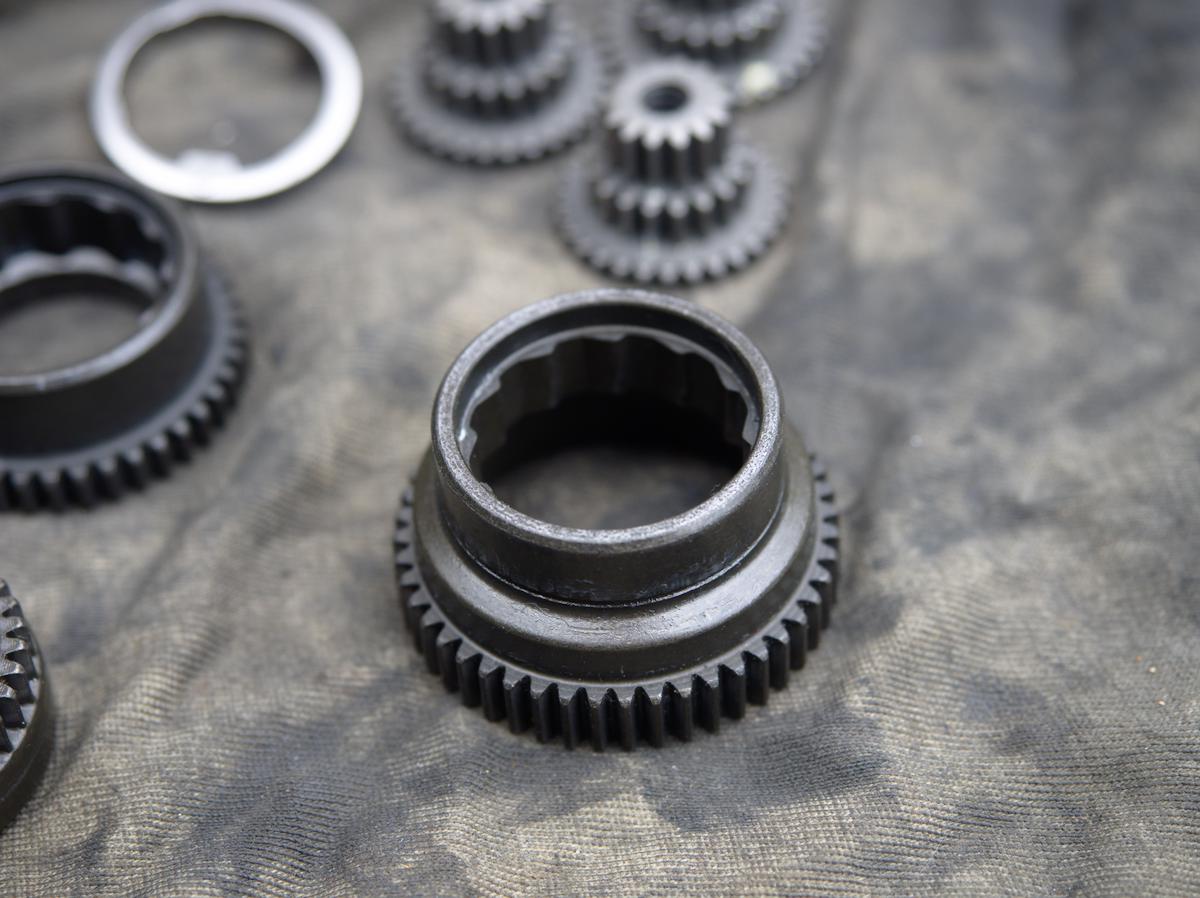
The first gear ring

The smooth section mates with a roller clutch on the hub driver, so that when the main clutch doesn’t engage the planet cage, power goes through the roller clutch to the gear ring. When the main clutch is engaged, the gear ring idles, overrunning the driver’s roller clutch.
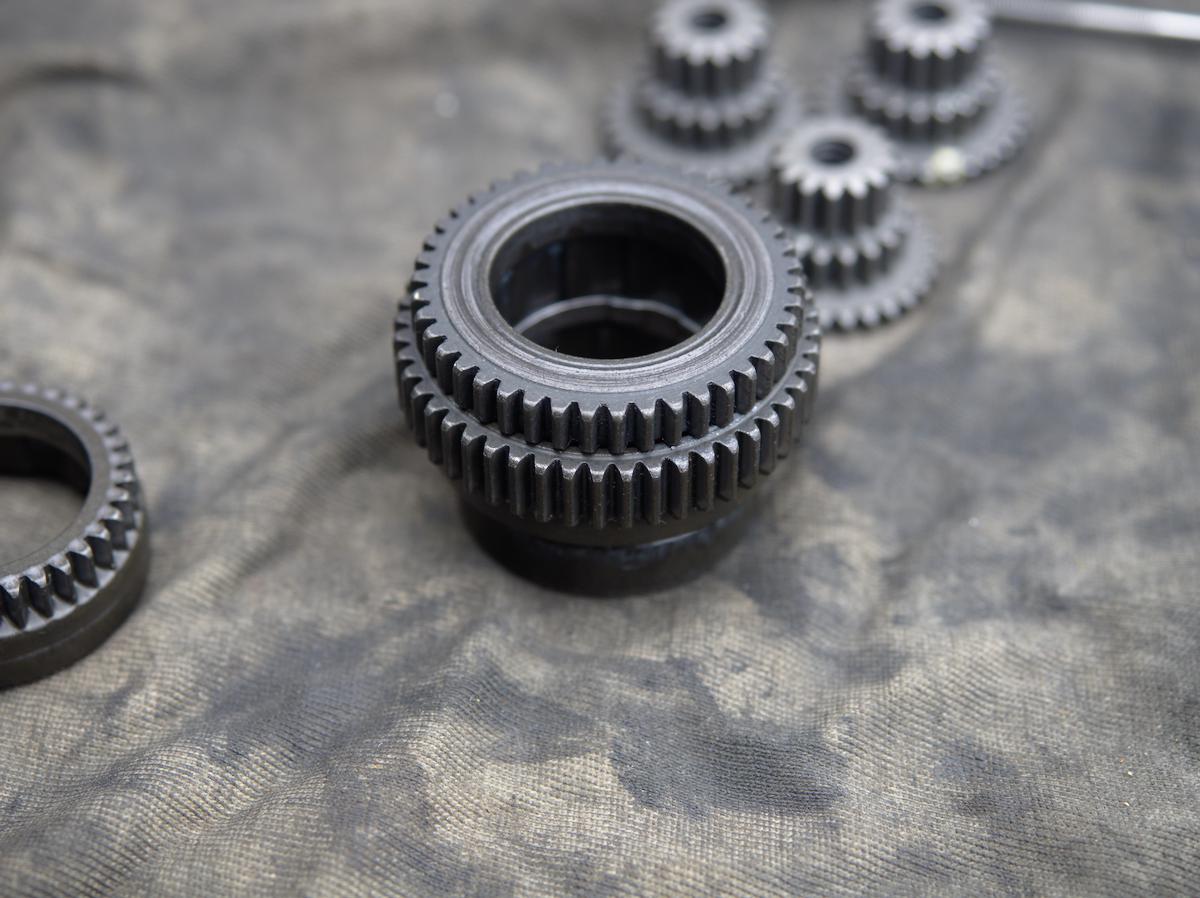
Planet cage assembly
As far as I can tell, the only purpose for this snap ring is to prevent you from unintentionally dropping the planet pinion shafts and losing them. Which is a good idea (and even better, this snap ring was easy to remove)

Note that there are two planet pinion shafts, but they sit in the same hole in the planet carrier. I used a spoke to push both of them out at once. A good idea (if you could get the materials) would be to replace each pair of shafts with a single long shaft, as that would make both strip down and reassembly much less fiddly.
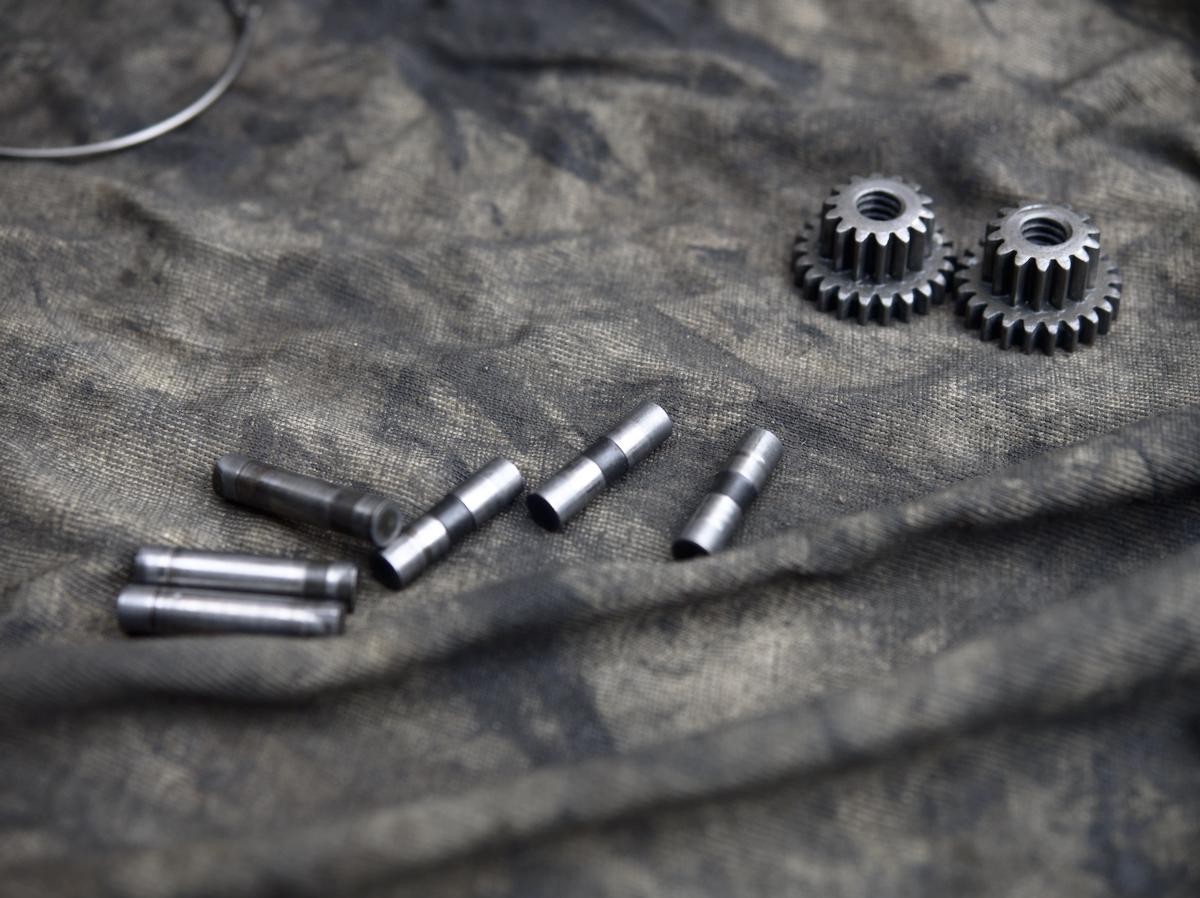
The shafts on the right came from the first stage planet pinions. The black bands seem to be on purpose from when they were manufactured, not some kind of wear or defect.
The planet pinions didn’t have needle rollers. I suspect that what looks like a screw thread is designed to channel lubricant (grease in this case) through.
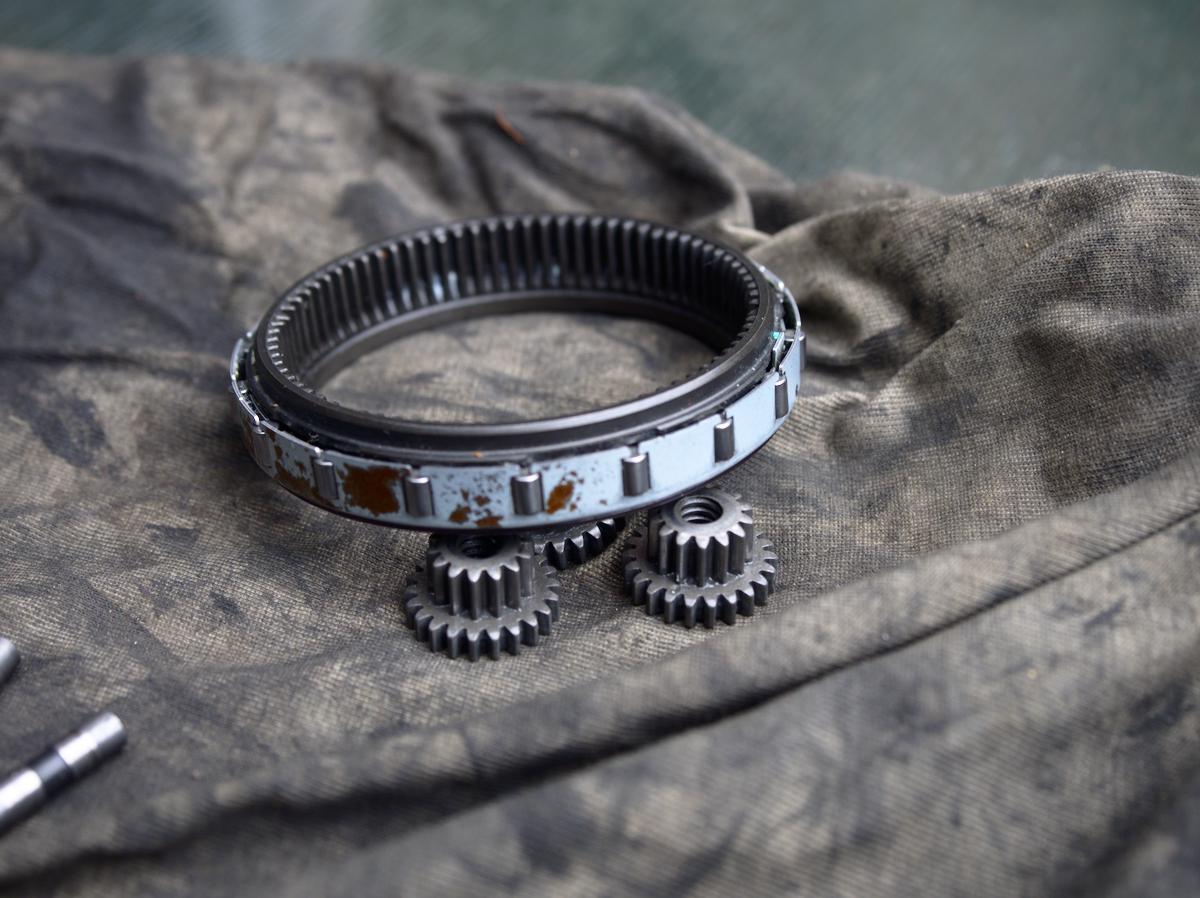
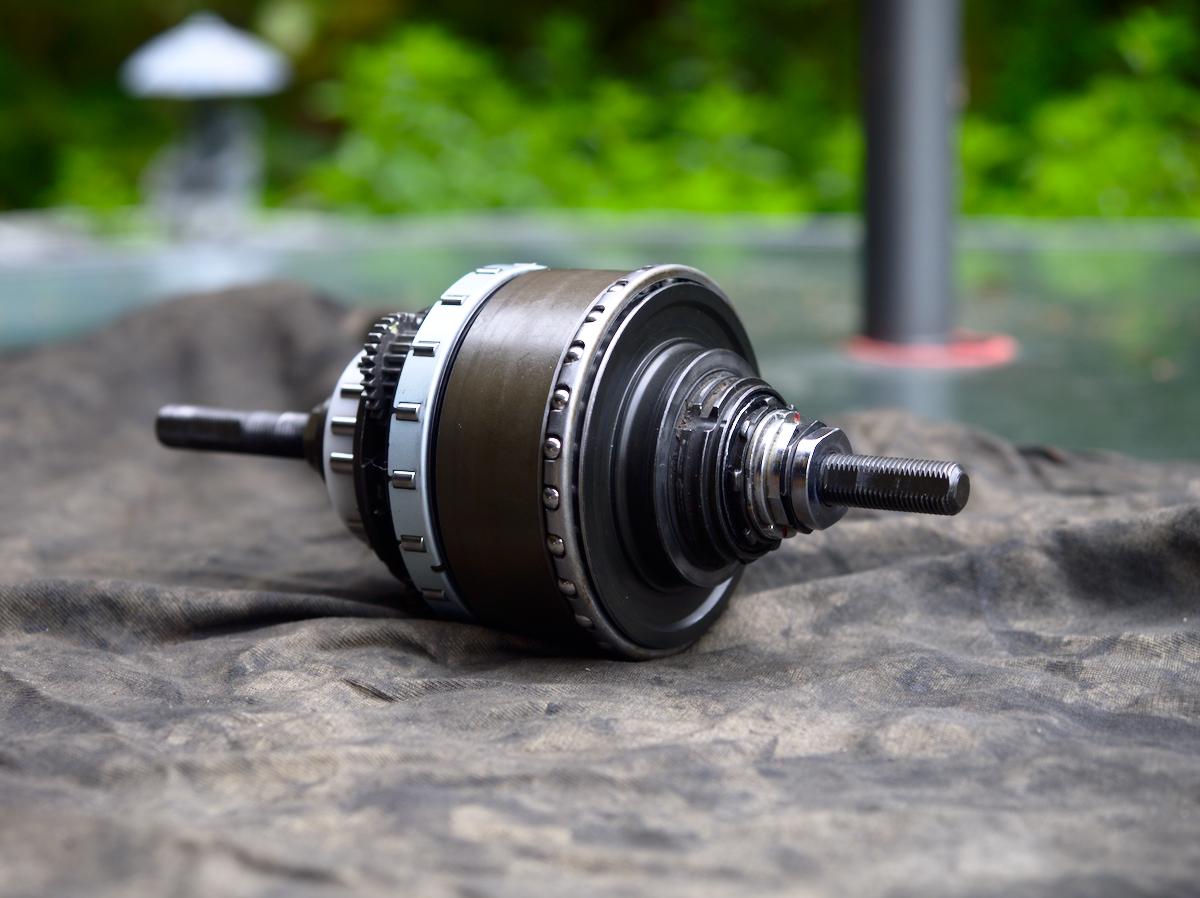
The discolouration on the second stage ring gear may be rust. It didn’t seem particularly rough on those marks though.

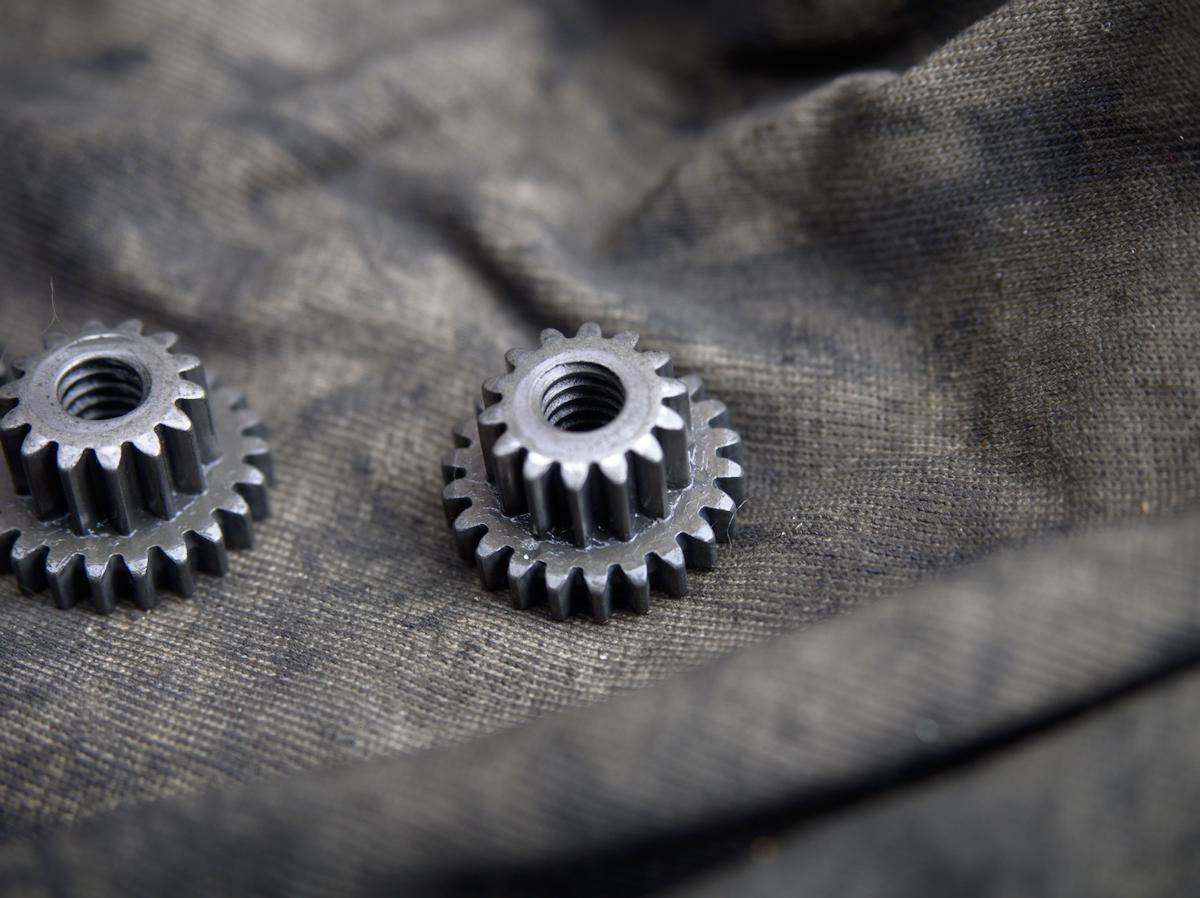
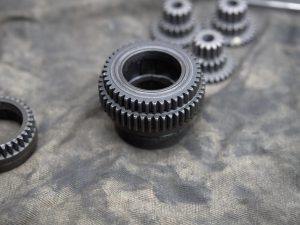
Sun pinions from the second stage
Note that the top sun pinion has a collar that sits inside the lower sun pinion
This is the top sun pinion turned over

Note that there is a keyed washer in there.
Note the marks on the meshed planet gear teeth.

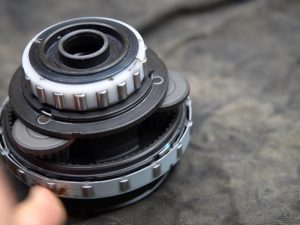
Checking that the planet gears are correctly aligned by spinning the gear ring. It turned freely, success.

More timing marks. These were not at all easy to see; definitely something to be done with ample lighting.
As you may be able to tell, I cleaned the internals up before I took all the photos. It was originally covered in dark grease which I think was white when it was new (there were sort of white streaks in the black grease you see).
disassembly
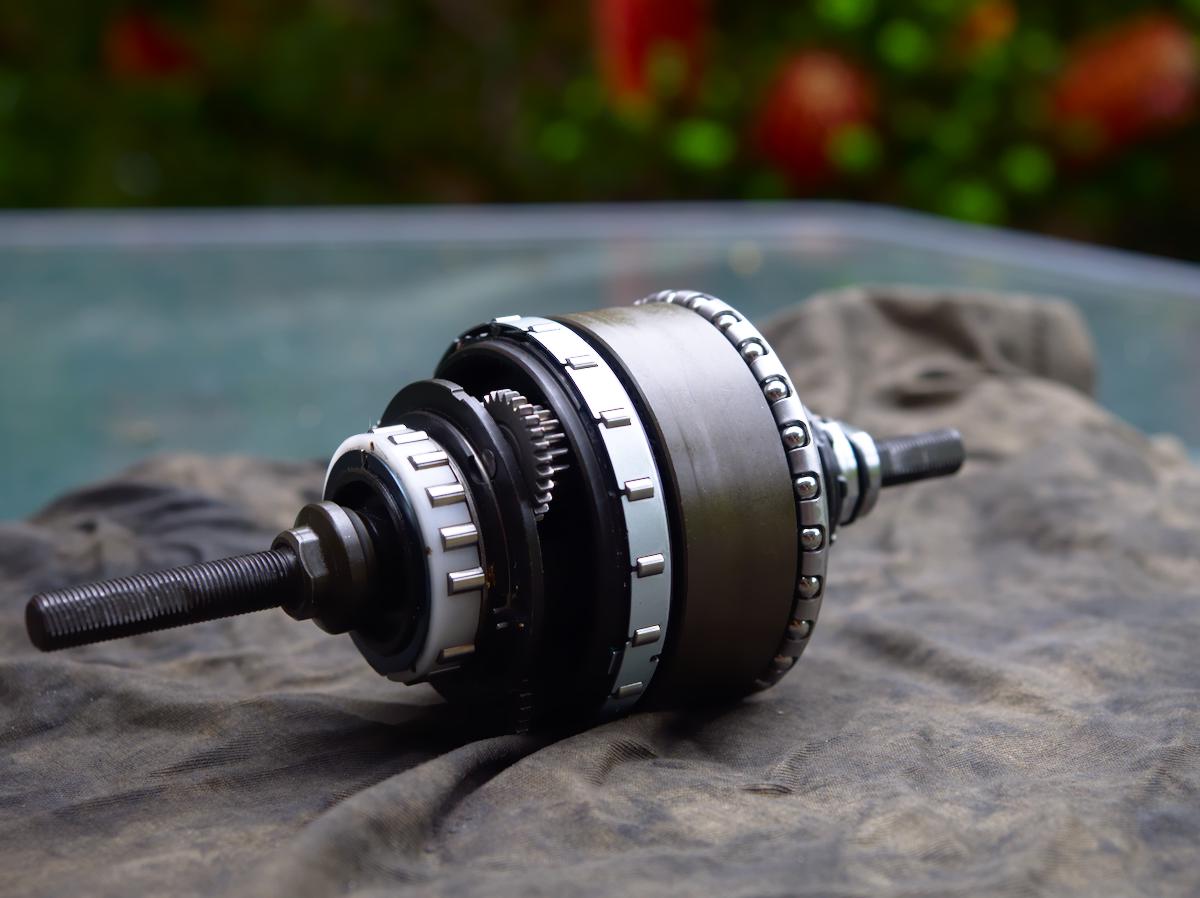
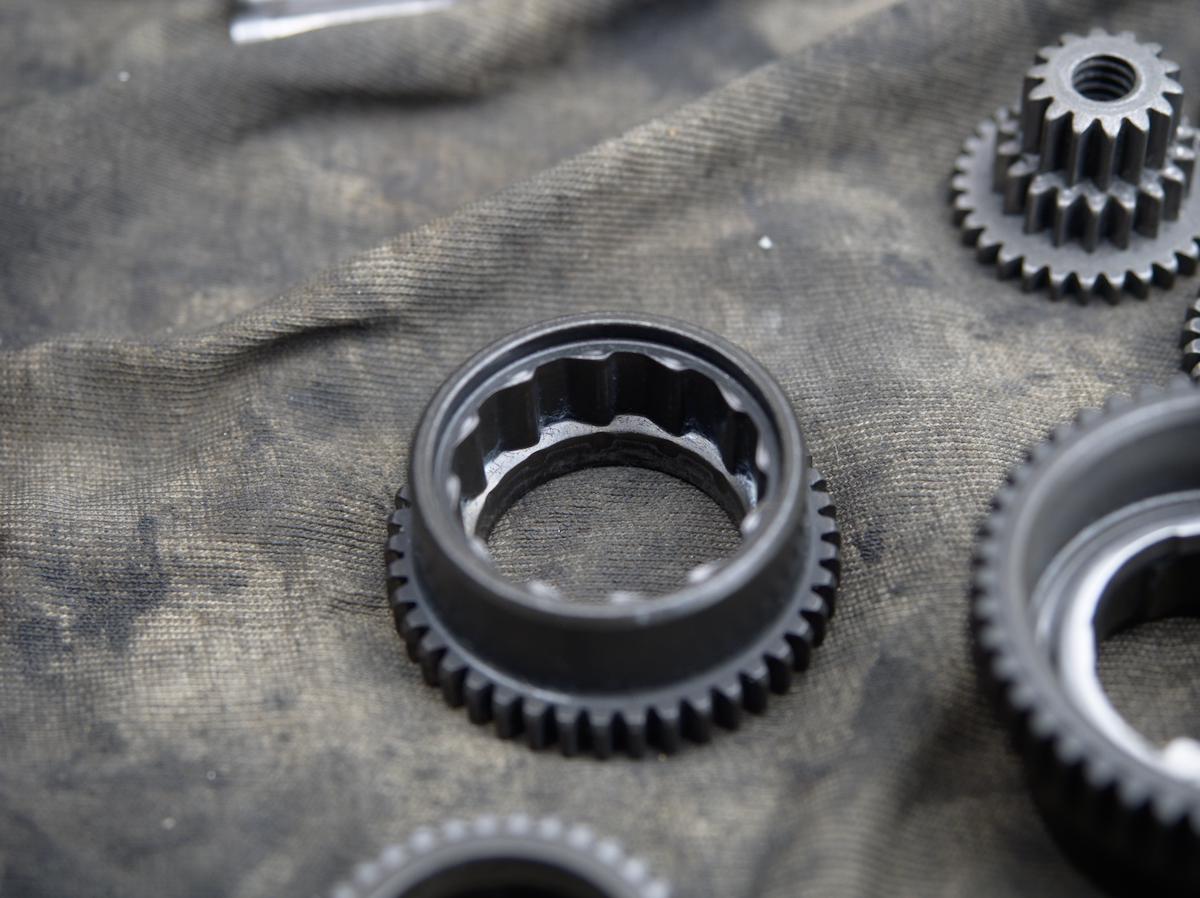
With the snapring removed, I could lift the first ring gear off the planet cage.

On the right hand (non-drive side) end, I also removed the snapring that covered the planet gear shafts, so that the shafts could now slide out of their holes. This was the next surprise: there were two shafts in each hole. I’m puzzled why Shimano didn’t just put a single long shaft in, that supports both sets of planet pinions.
I’ve used a magnet to remove such parts in other hubs, but because there are two separate shafts in this one, I found it was easier to use an old spoke to push them out from the other side of the planet cage.
A good idea (if you could get the materials) would be to replace each pair of shafts with a single long shaft, as that would make both strip down and reassembly much less fiddly.
The second stage sun gears were held captive by the first stage planet gears, so once the planet gears were removed I could just lift the sun gears out.
how it works
Like most gear hubs of more than 5 speeds, this one can be thought of as two gearboxes in one unit. In this case, it’s effectively a 2 speed that then drives a 4 speed. I’ll call these first stage and second stage.
We’ll start with the second stage.
The second stage consists of the three sun pinions, and the compound planets with three steps. The planet cage is always the input, and either the gear ring or the planet cage is the output. The output from the second stage drives the hub through one of two roller clutches.
If no sun gear is selected, then the planet cage is the output, and the second stage provides direct drive. The planet cage drives the hub through the roller clutch at the left end of the planet cage.
If one of the sun gears is selected (by raising one of the axle pawls) the ring gear turns faster than the planet cage. So the ring gear drives the hub (through the ring gear’s roller clutch), and the hub overruns the roller clutch on the planet cage. How big the increase gear is depends on which sun gear is locked (the different sizes of the planets change the gear ratio).
Hence the second stage has 4 gear ratios; direct drive plus three increase gears.
The first stage is simpler, and offers two ratios, selected by moving the toothed clutch. The input is from the hub driver (which the sprocket is attached to) and that drives either the first ring gear or the planet cage. The output for the first stage is always the planet cage (which is also the input for the second stage of the hub).
If the clutch is retracted, a roller clutch on the driver drives the ring gear, and the first stage provides a large reduction gear (gearing down the whole range of the second stage).
If the clutch is extended, it engages the planet cage, giving direct drive for the first stage. The first sun gear is always fastened to the axle, so the planet gears still turn, but the gear ring overruns the roller clutch on the driver.
So the first stage has two gears; direct drive plus a large reduction gear.
wtf shimano, y u no even gear steps?!?!
As Sheldon Brown noted, with this hub some gear ratios are more closely spaced than others, which is a drawback. As I said at the start, this was also a good part of why John Harland had decided not to use this hub in a bike.
There is a bit of maths to designing an 8 speed hub with evenly spaced gear ratios. But I’ll try to explain it in a way that’s easy to understand.
What you want is for the first stage to offer two selections, 4 steps down or direct drive; and the second stage offers direct drive and 1, 2 or 3 step increase gears.
You add the first stage (-4 or 0) to the second stage (0, +1, +2 or +3), and you can get 8 gears from -4 steps to +3 .
Now comes the complicated maths bit.
You choose a step between gear ratios, perhaps 20% is reasonable for an 8 speed.
The reduction gear in the first stage is our chosen step (20%) raised to the power 4 (ie 1.2^4, not 0.2^4). So, we would need to pick gear ring, planet, and sun gear sizes to get as close as possible to that gear ratio. That might be difficult, because 1.2^4 is about 2.1 (a hard ratio to achieve due to the theory behind epicyclic gear trains); but it might be achievable with compound planet pinions.
Similarly for the second stage, we want to choose gear sizes to get ratios of 1.2 to the power 1, 2 and 3.
Of course, it’s almost certainly going to be impossible to get gears to exactly match these powers of 1.2, but close enough is good enough. If some gear steps are 21% and others are 19%, they’re pretty much evenly spaced.
I haven’t worked out any exact teeth counts to implement this idea though.
reassembling the hub
This was one of the most fiddly hubs that I’ve encountered in terms of reassembly. Of course, keeping the internal unit together makes it much simpler since then you don’t need to re-synchronise the planet pinions.
To start with, I put just the bottom sun gear into the planet cage (note that there’s a washer that sits underneath it).

Then I set the planet gears around it so that they were aligned with the holes for their shafts, and so that the index teeth were meshed with the sun gear. Note that the marking on the index teeth was often really hard to see, so it’s essential to do this in a well lit area. I did it outside in daylight (in summer), which was adequate.
I then carefully lowered ring gear 2 onto the planet gears. It was tricky because the ring gear would tend to nudge the planet gears out of alignment, and I had to go back and redo this step several times before I was happy that I’d done it right.
After that I lowered the other two sun pinions in, one at a time.
Replacing the planet pinion shafts was next. Note that you have to put the shafts for the first stage pinions in first. I used the second stage shafts to push the first stage shafts through. Of course, you also need to place the first stage planet pinions so that they are mounted on the shafts. I found that holding the hub in my hand with the axle horizontal was the easiest way to do this, but it was still very fiddly to get everything to line up so that the shafts go into their holes in the planet cage.
Note that at this point the first stage planet pinions don’t need to be synchronised. You do need to have all three second stage sun gears in place because the first stage planets hold the sun gears inside the planet cage.
Once the planet pinion shafts are all in you need to replace the snapring at the end of the planet cage that holds the shafts in place, otherwise they fall out when you turn the planet cage over.
At this point you should check that the planet gears are correctly synchronised. You can do this by spinning the second stage gear ring around with your hand. It should turn freely with little resistance. If it binds up (like a cross threaded screw, or screw with the wrong thread pitch) then the planet gears aren’t correctly synchronised; take it apart and start again.
The last thing to do to reassemble the internal assembly is to put ring gear 1 onto the first stage planet pinions. Note that you have to make sure the index marks are aligned; I found that the easiest way was to have all the index teeth pointing inwards. I had to do this a few times before I got it right too, because once again the gear ring tends to nudge the planets out of alignment as you lower it into place.
Before you replace the snapring that holds the first stage gear ring on, you should check that the first stage planet gears are synchronised. Place the internal assembly back onto the axle so that the sun gear meshes with the planets. You should be able to turn the ring gear quite freely. When you place the internal assembly on the axle assembly note that there’s a washer inside the second stage sun gears with a tab on it; this tab should slot into a groove that runs along the axle.
With that done, you should attach the snapring that holds the first stage gear ring on the planet cage.
Attach the circlip on the left end of the axle, and we’re done. The internals would now be ready to go back into their hub, if I had it.
Thank you very much for all these informations and photos of this hub.
A detail or the “pawl unit” would be glad. A further report maybe.
You’re welcome.
I still have the internals laying around, so I’ll be able to prepare detailed photos of the axle sometime soon.
Hi, thanks for the great article! I have three Shimano 8 sp.’s one nexus and two alfine. I took one of the alfines apart to far and struggled getting the planetary gears all installed. I have all the special shimano tools also. So I just took the innereds out of spare hub and used that for the next year. I placed the dissembled innereds in a jar full of trans oil so it would not rust as the environment in Costa Rica is soso hard on metal parts. Any way, it was time for a service again and I resolved myself to put the hub back together! I had a great idea while eating Chinese food one day. The chop sticks looked like the same diameter as the pins of the planetary gears. I used the sticks as a assembly tool and bingo, the two sets of planetary and ring gears just fell into place!
Thanks for sharing. The tip with the chop sticks worked great for me.
has anyone got the main drive roller clutch -(1st picture very left hand clutch) i need one because i bought one on ebay and this part is missing. shimano in their wisdom don’t do anything other than the whole thing and spares on ebay are rare and horrifically expensive. thanks.
Thanks man! I was searching for some pointers on how to sync those planet gears without that TL-8S30 tool and if it wasn’t for your article, I wouldn’t have seen those timing marks.
To make planet pinions not move, I used a simple rubber band around all three. After that putting on the ring gear was a walk in the park.
Thank you so much for this article! I was not aware of the markings on the planet gears. I tried it for 4 hours until I figured it out.