When it comes to 7 speed hub gears that are available in the current market, there are two approaches to implementation: First, the single stage approach, with compound planet gears having 3 different radii. This type of 7 speed implementation can be found in hubs produced by Sturmey Archer, and by Sachs, since the mid 1990’s.
Very briefly, they achieve 7 speeds by gearing up and gearing down through the same planetary gear set, ie increase gears are achieved by driving the planet cage (hub is driven by the ring gear) and reduction is achieved by driving the ring gear (planet cage drives the hub shell). 3 reduction gears (as the planet pinions have 3 steps) + 3 increase gears + direct drive = 7 speeds. Note that this design is kind of like an extension of the Sturmey Archer 5 speed: essentially an S5 with an extra sun pinion and with 3 stepped planet pinions instead of the two-stepped planets in the S5.
Option 2 is more interesting.
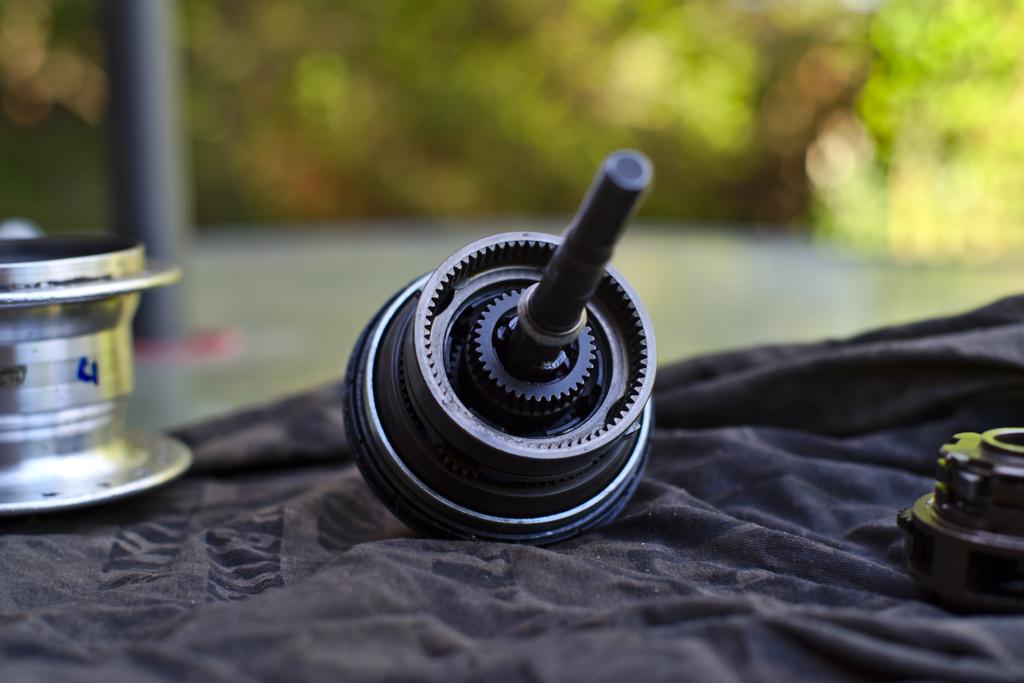
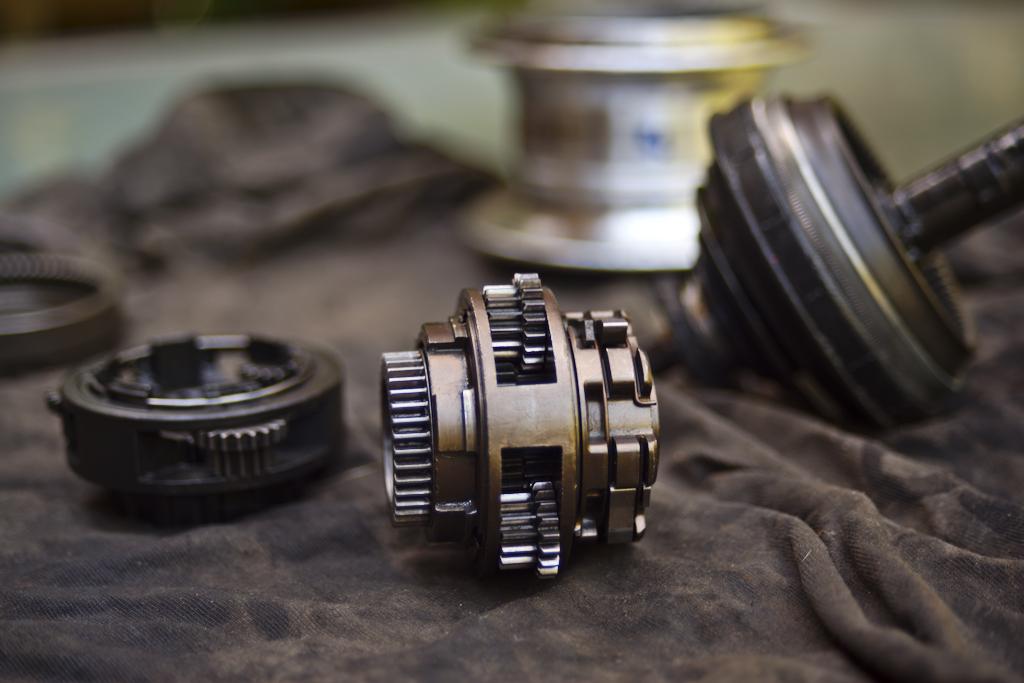
One planetary gear set (the first stage) consists of two-stepped planet gears, two sun gears, and offers 3 gears: 2 reduction gears driving from the ring gear, and direct drive. The sprocket drives the ring gear of the first stage, and output is taken off the planet cage. The sprocket may drive the planet cage directly when the first stage is in direct drive.
The second planetary set is driven from the planet cage as input, and gives 2 increase gears and direct drive. Power is taken off the ring gear (and also the planet cage in direct drive). Note that both stages have a common planet cage, because the output from the first stage is fed into the input of the second stage.
Of course, 3 x 3 means there are 9 possible combinations, however only 7 of these are used. This is because in practice, several of the gear ratios are either very close together or identical ratios. Only one of each of these duplicate gears is used, which means that overall there are seven distinct gears available.
Shimano’s Nexus 7 speed hub is implemented with this second technique. The only other manufacturer that I’m aware of to do it this way is Rohloff, who incorporated this design in the Speedhub. It would seem that Rohloff were the first to use this approach, and got a patent on the technique of using the same gear sets on each side in order to get almost perfectly uniform 13.6% steps between gears. Shimano’s hub has different sized gear rings, planets and sun gears on the reduction and increase gear sets, and their hub doesn’t have uniform steps between gears (although the Shimano hub’s gear steps are fairly consistent).
recommended reading
Unlike Shimano’s 8 speed variants (nexus & Alfine 8) there is already quite a good amount of documentation available for the 7 speed. Sheldon Brown is an excellent place to start:
I also highly recommend two PDF documents that were written by Wouter Pasman and which the above Sheldon Brown page links to:
http://mmi.tudelft.nl/~wouter/publications/pasman12b.pdfpasman12b.pdf This is a description of the principles behind how Shimano’s 7 speed works.http://mmi.tudelft.nl/~wouter/publications/pasman12a.pdfpasman12a.pdf A description of disassembling and reassembling a Shimano 7 speed hub.
This article will very likely encroach on what Wouter has already done, although I hope that readers will take my material as complementary. I don’t intend to go into as much detail on the theory side as what Wouter has, in formulae and calculating exact gear ratios.
in pictures

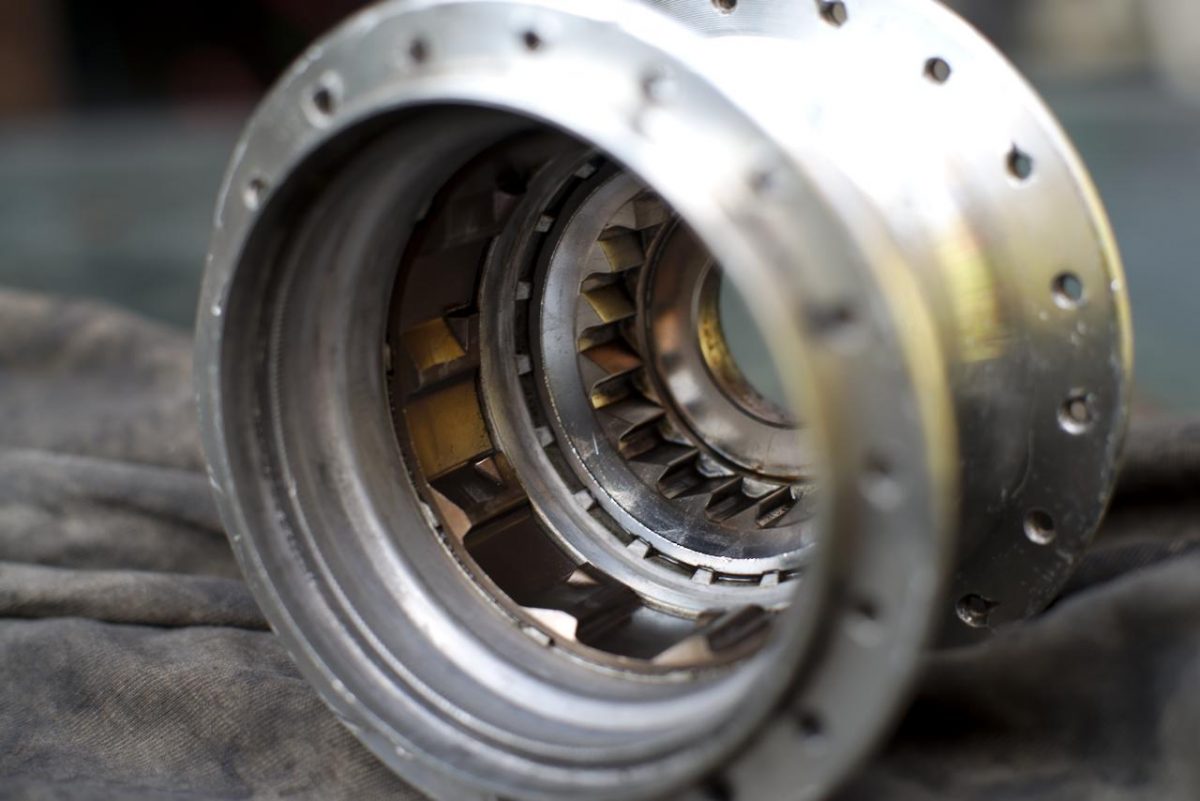
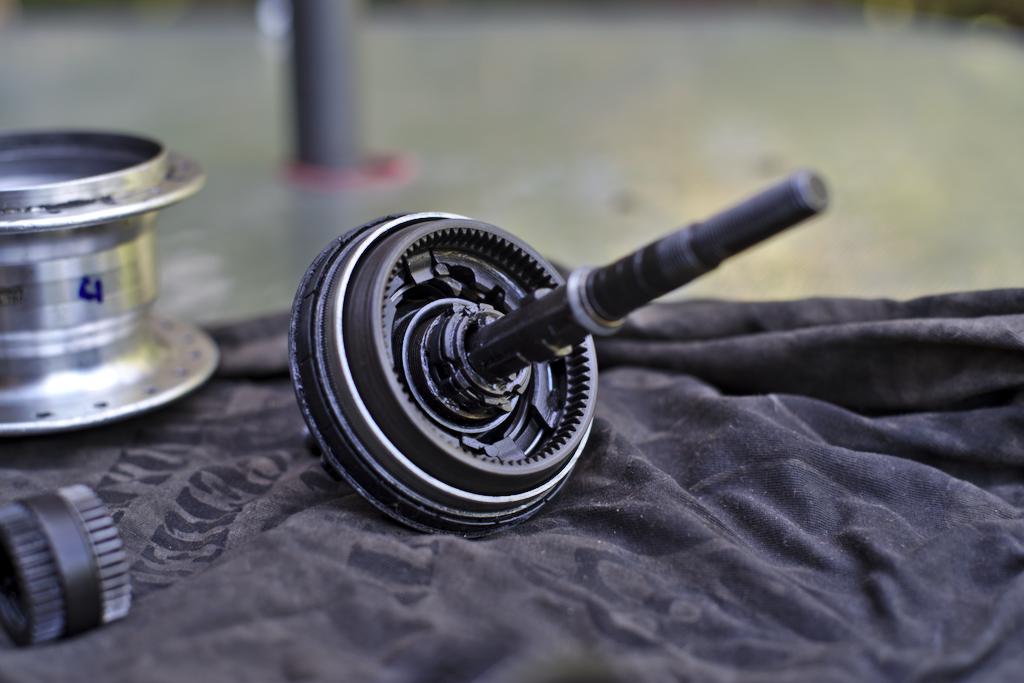
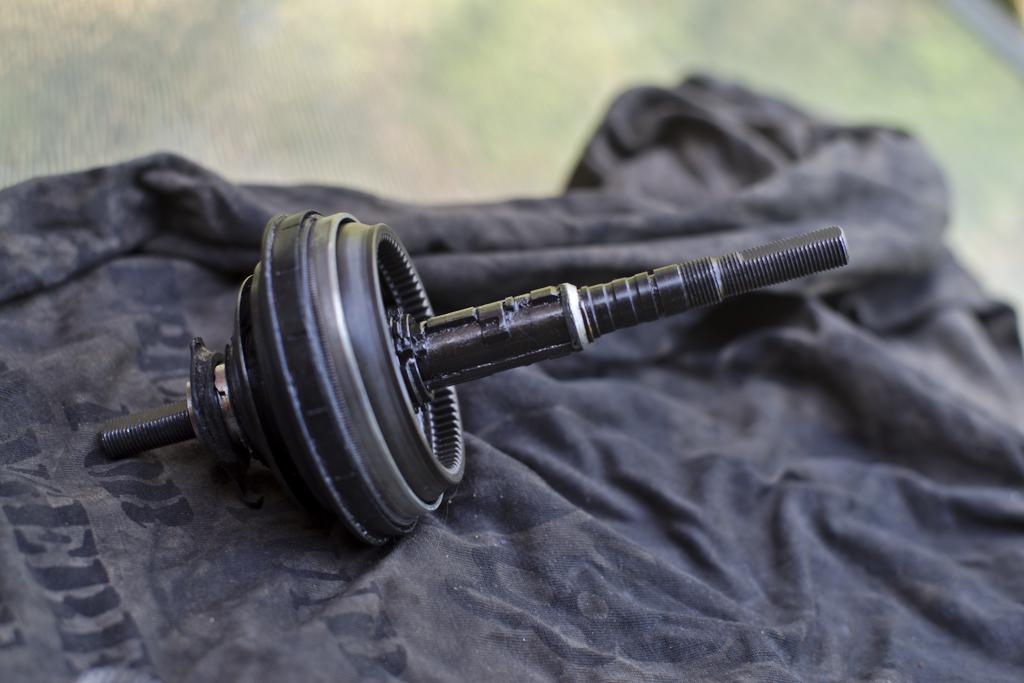
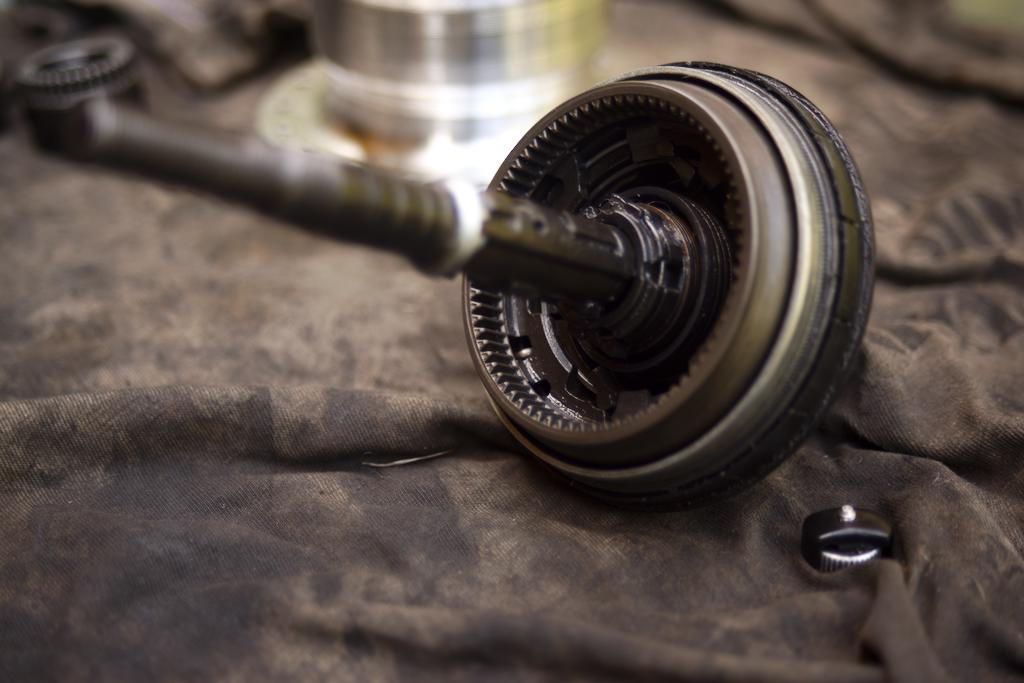
Hub shell This model has splines for mounting a roller brake (a type of drum brake made by Shimano). I noticed that the threads for the left hand cone don’t extend very far into the hub. As it happened the internals here actually came from a different hub shell.
The internals are press-fit into the hub shell; no big thread like old Sturmey-Archer’s.
The ratchets are the sturdiest that I’ve ever seen! Much more robust that Sturmey’s.
View of the output pawls.

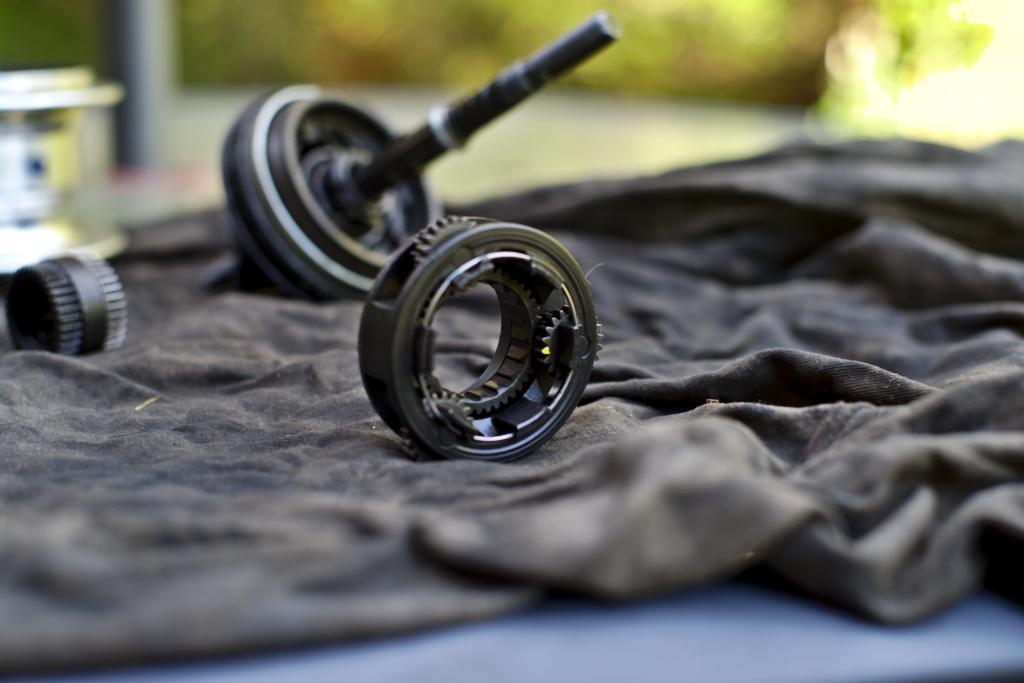
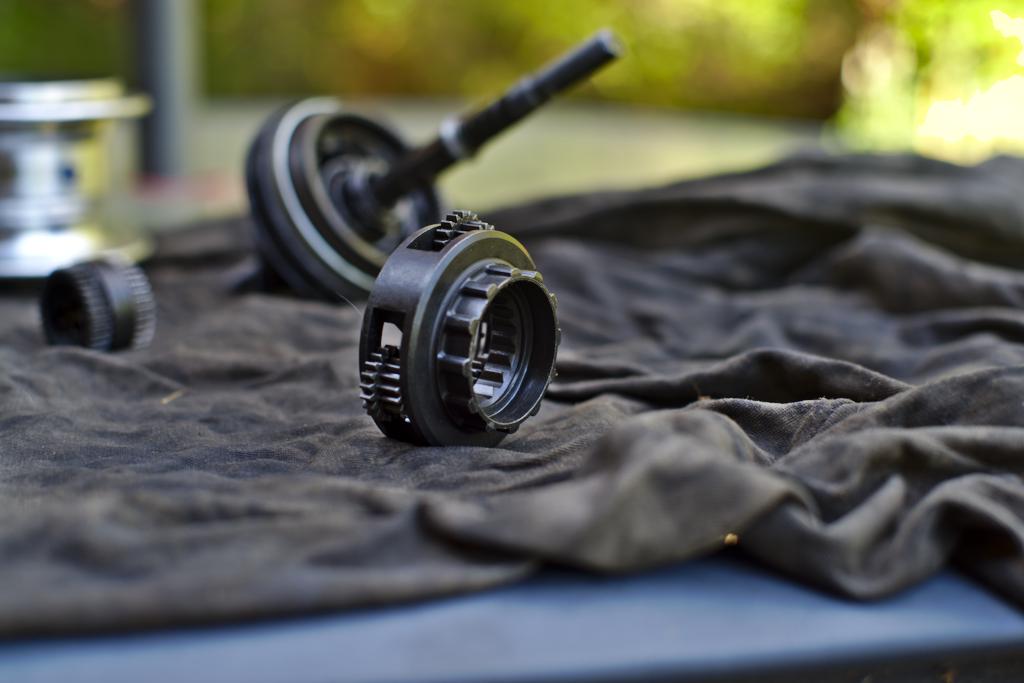
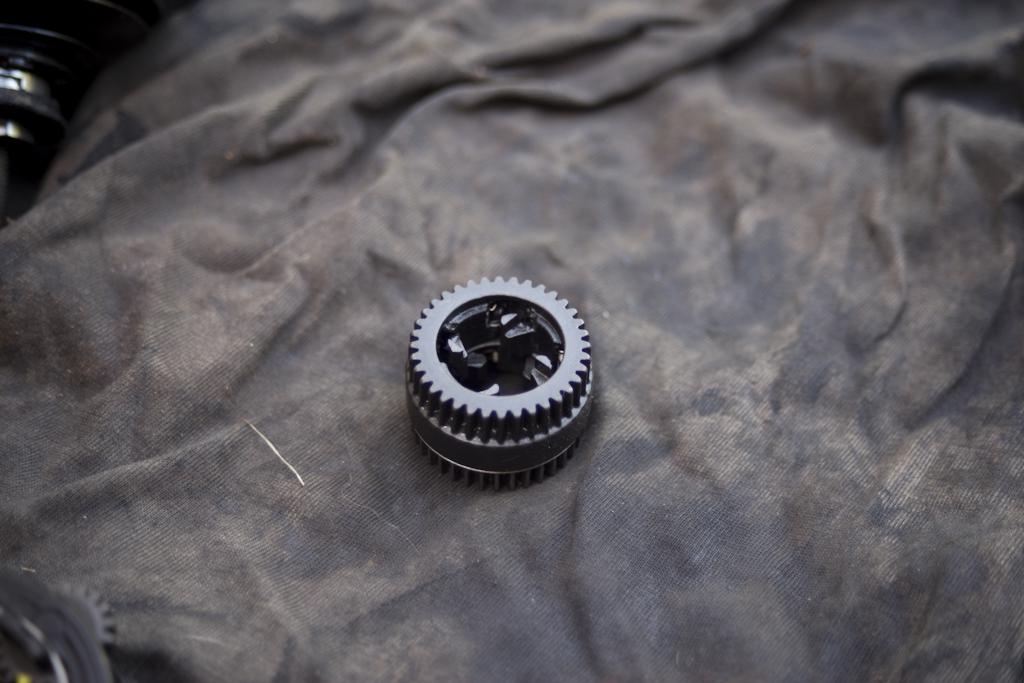
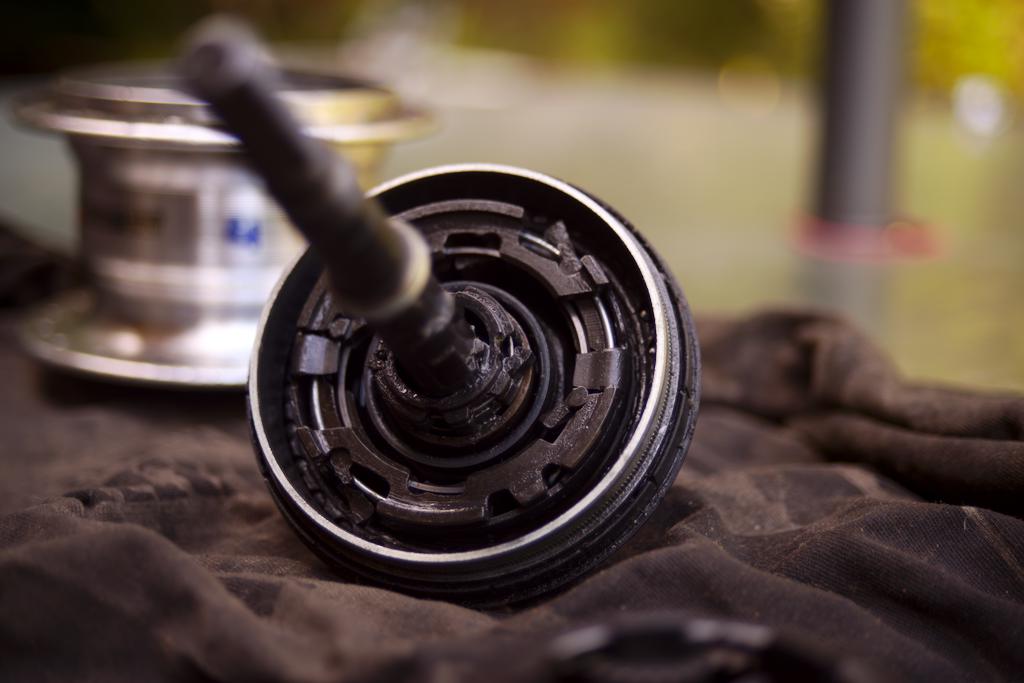
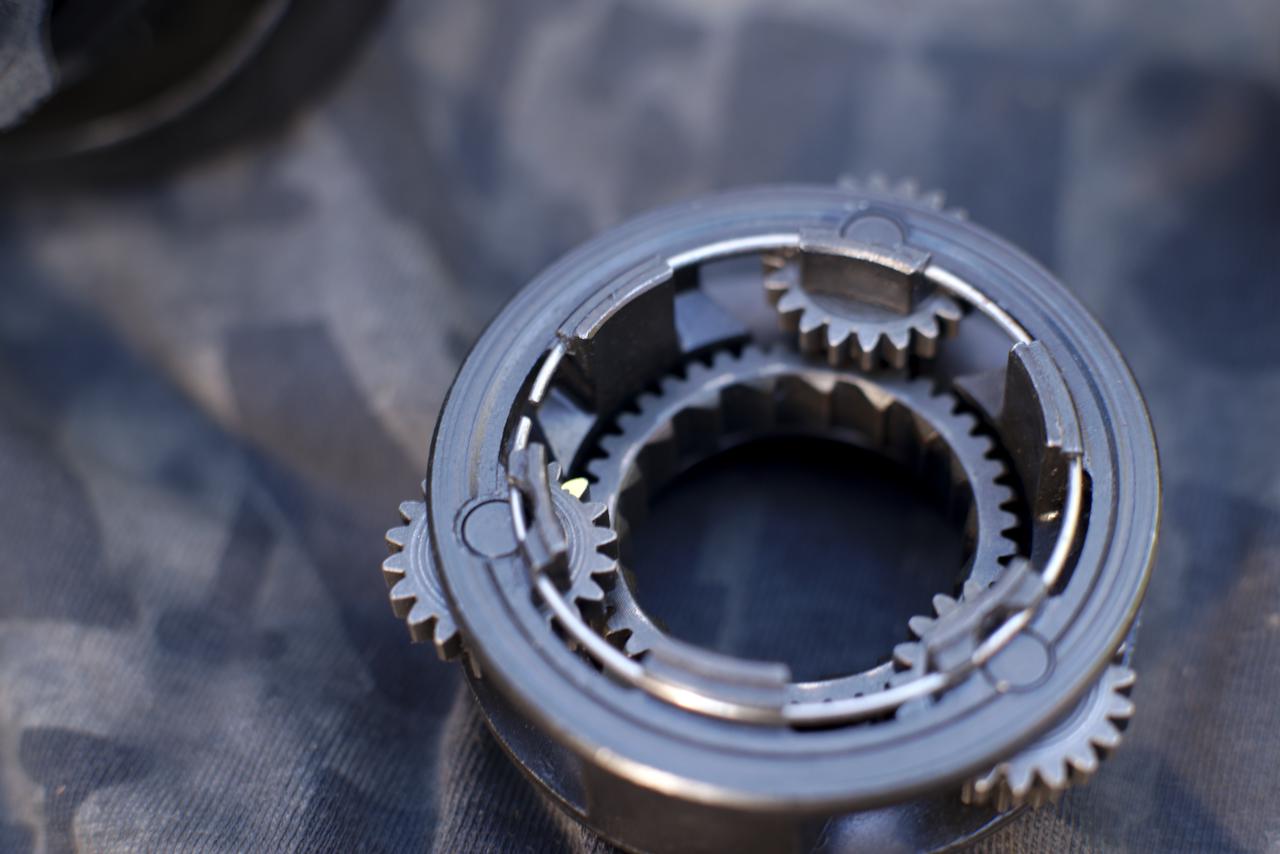
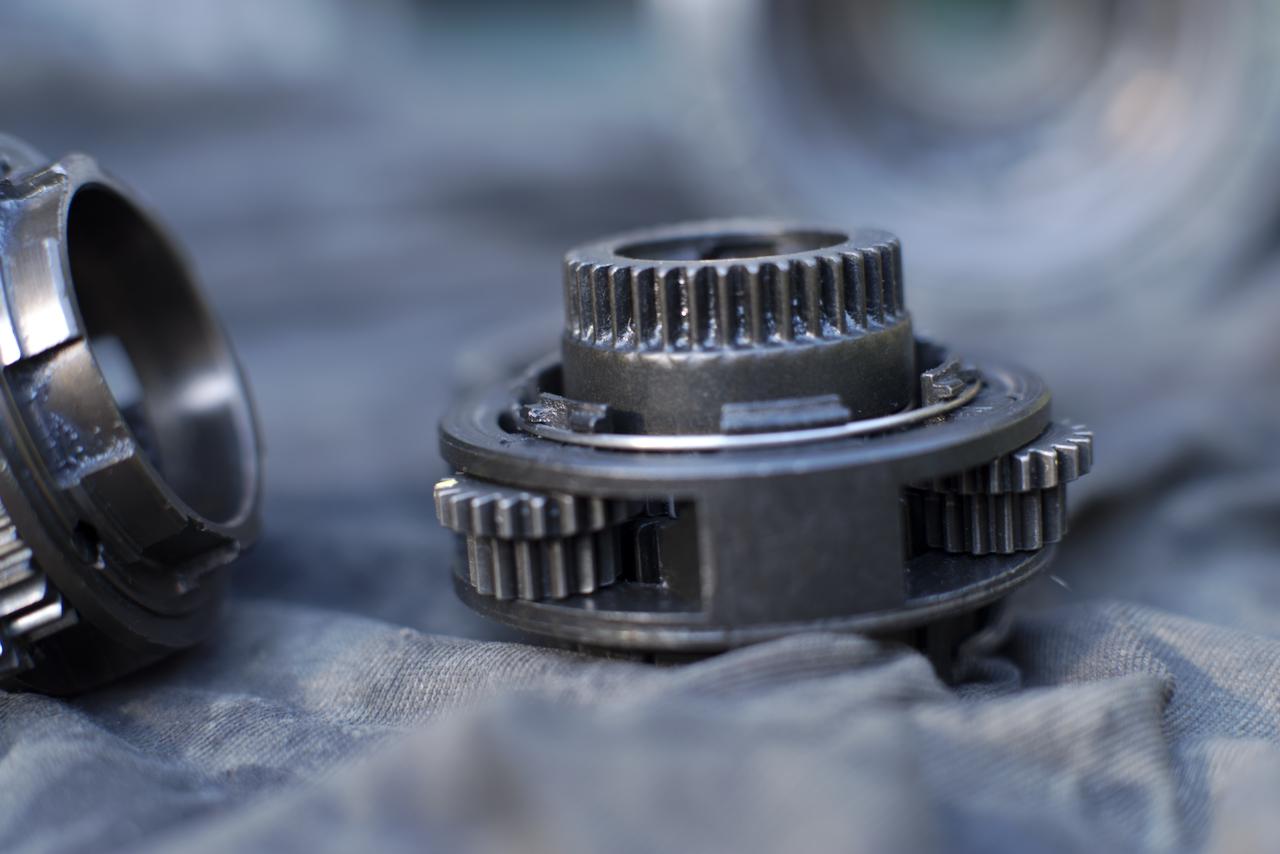
Second stage ring gear, and one of the sun gears
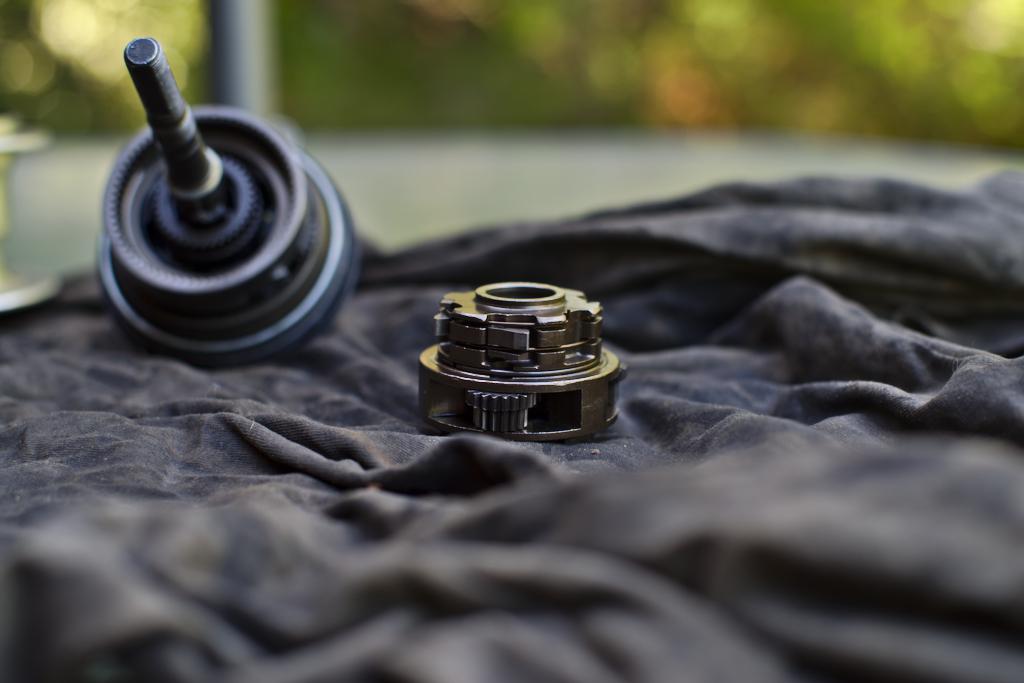
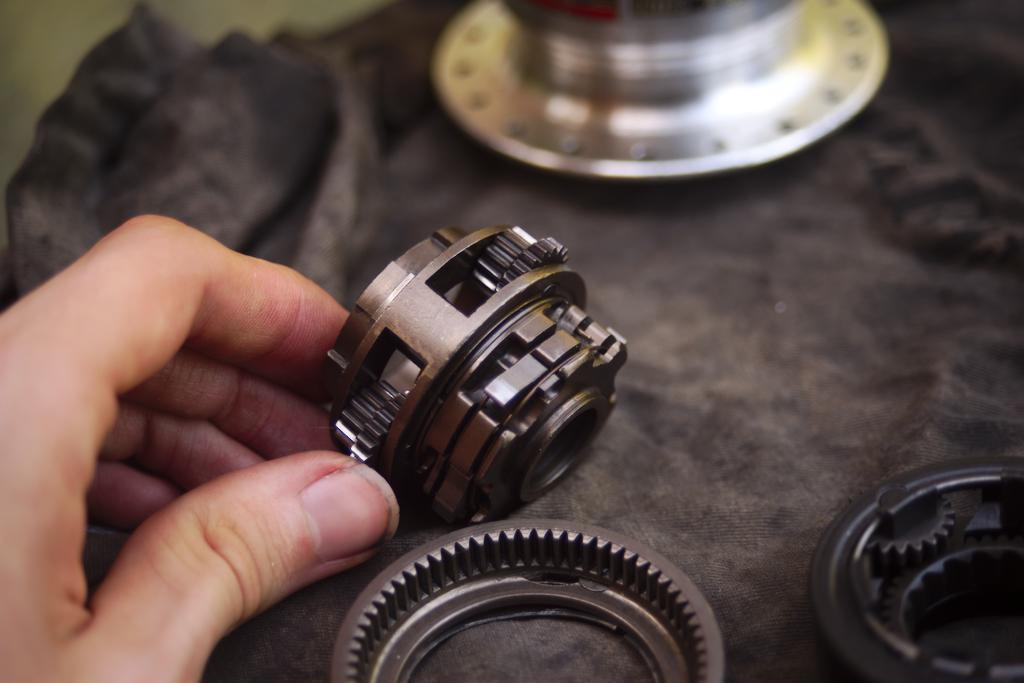
Second stage planet carrier.
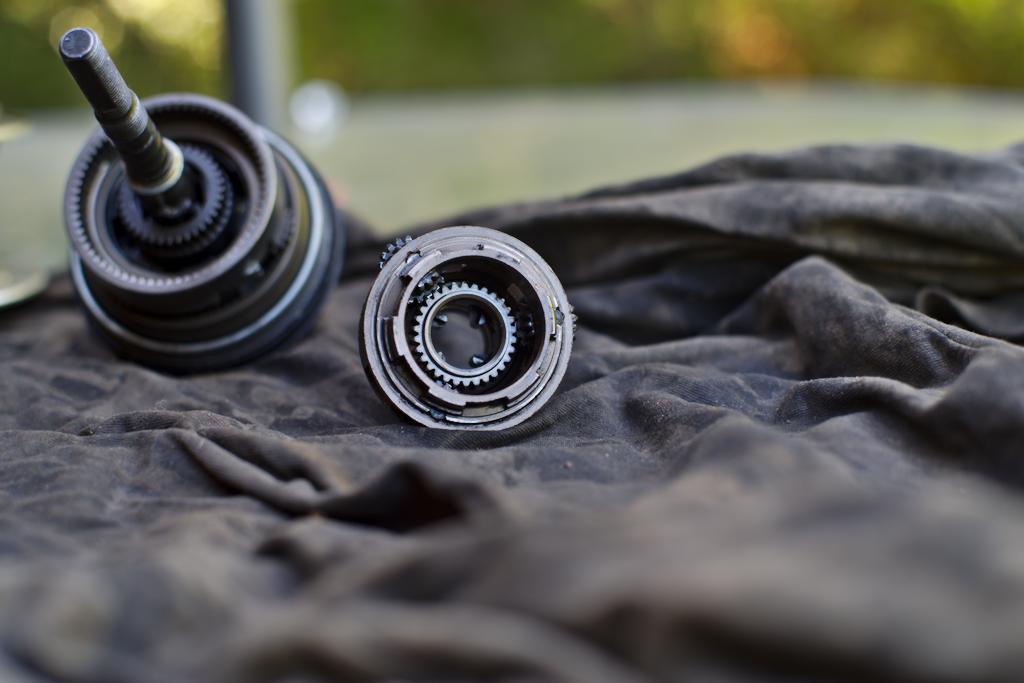
Looking into the second stage planet carrier. The sun gear is held captive because it has a flange on one end that prevents it from falling out.
Second stage ring gear
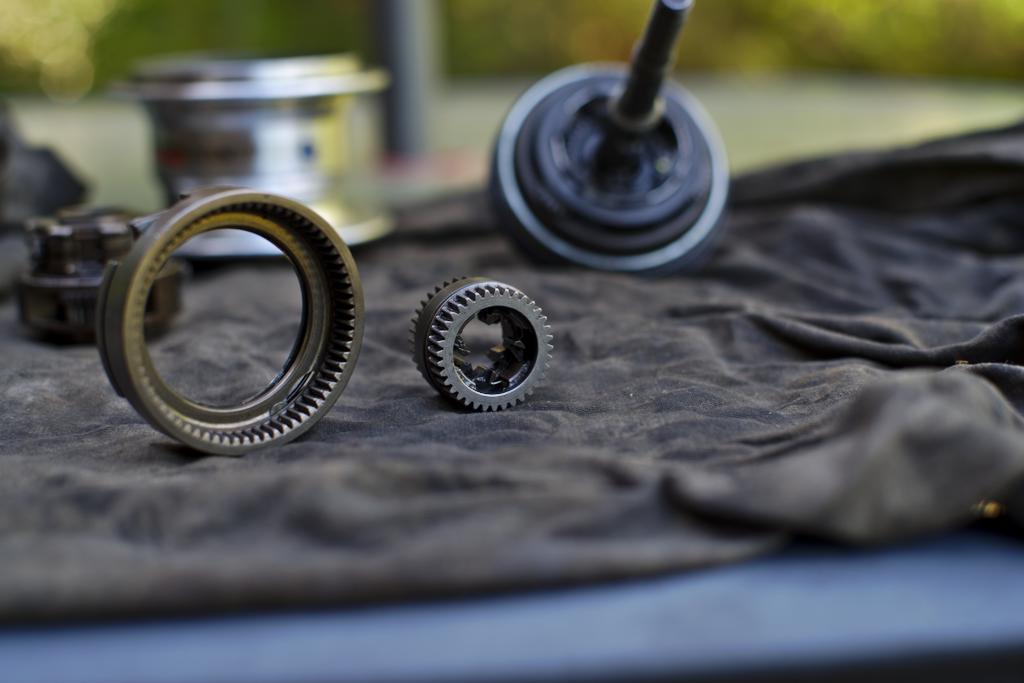
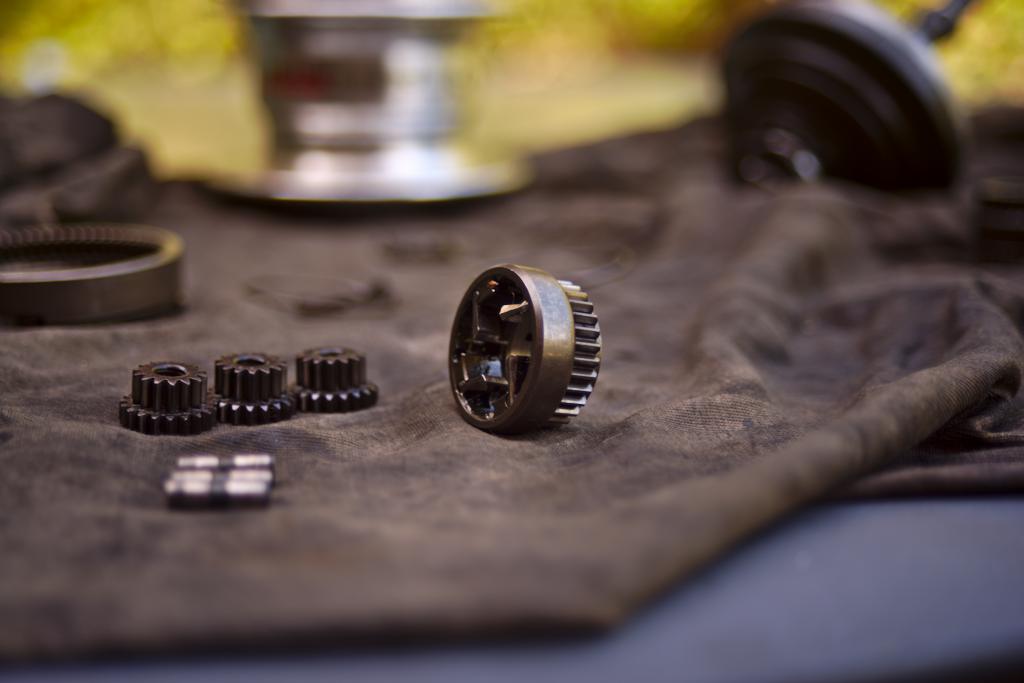
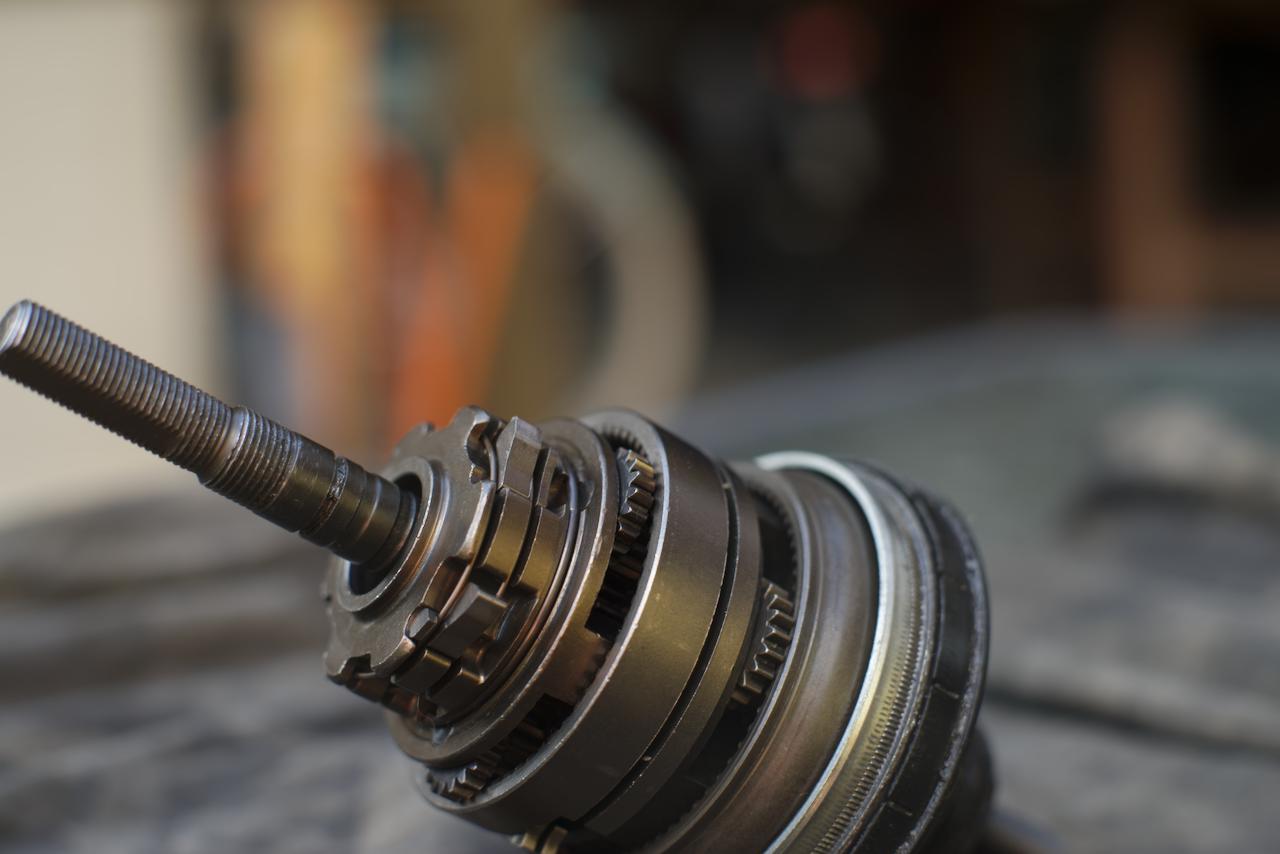
These two sun pinions sit between the first and second stage. It’s technically two separate sun gears, because they can rotate around the hub axle independently.

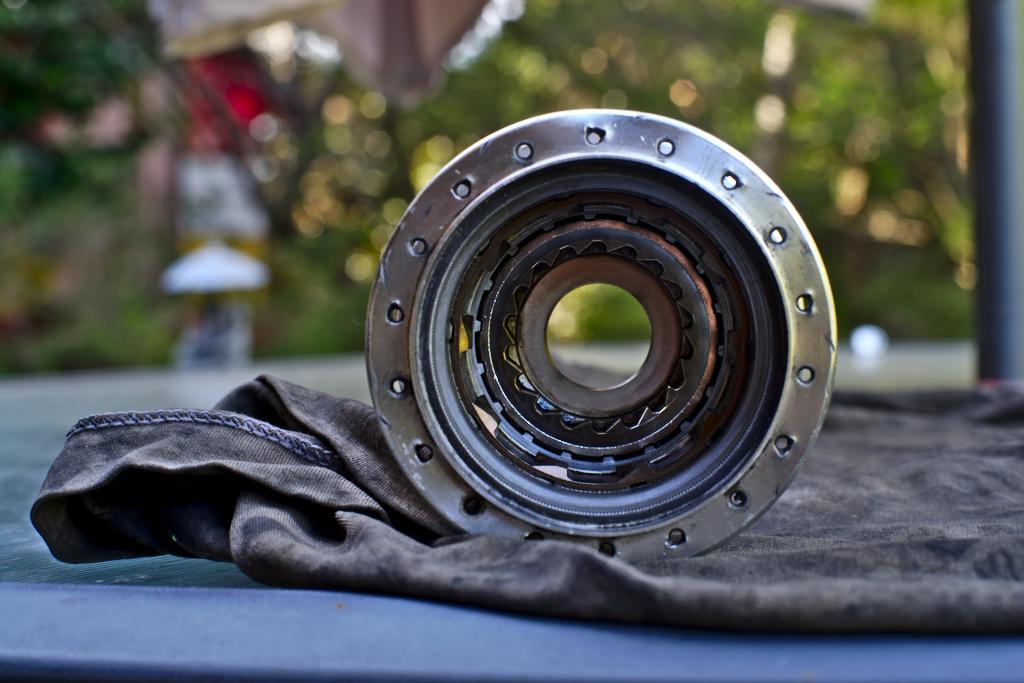
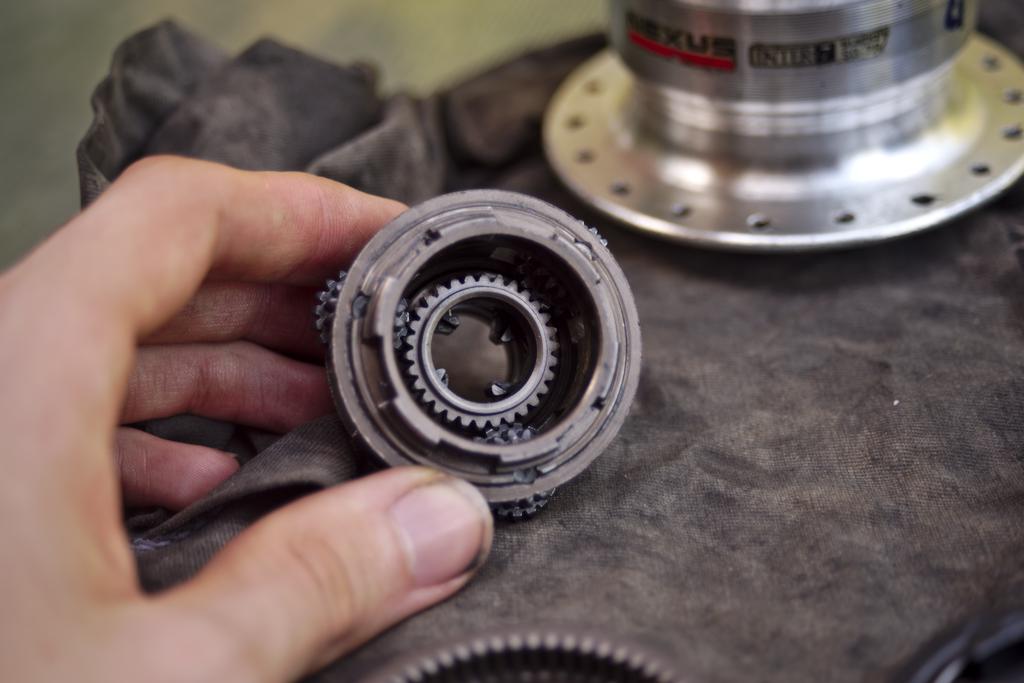
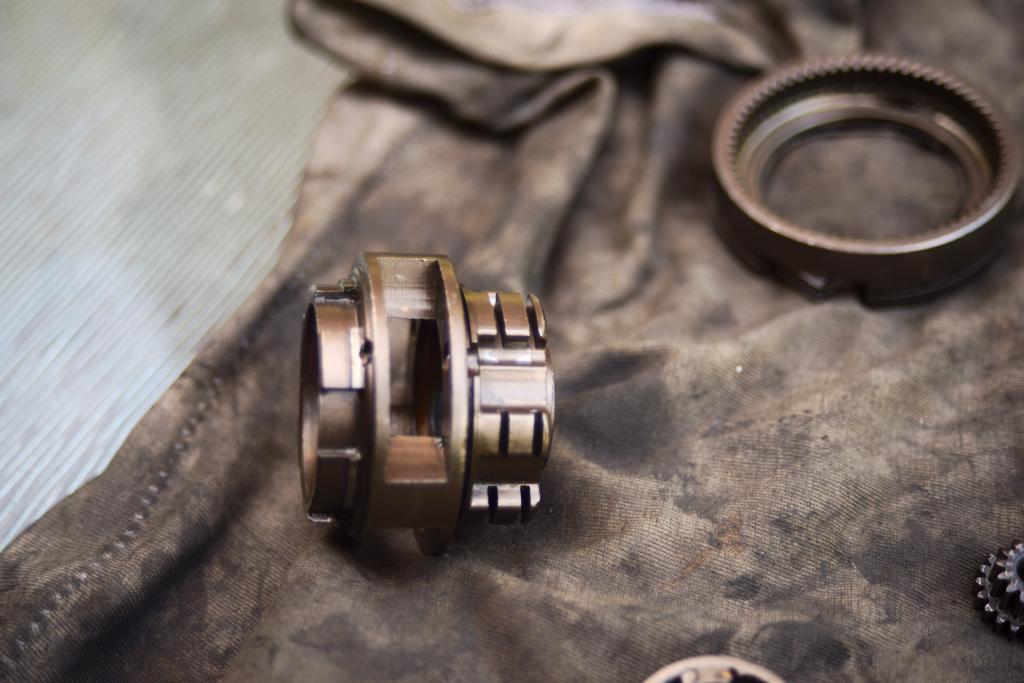
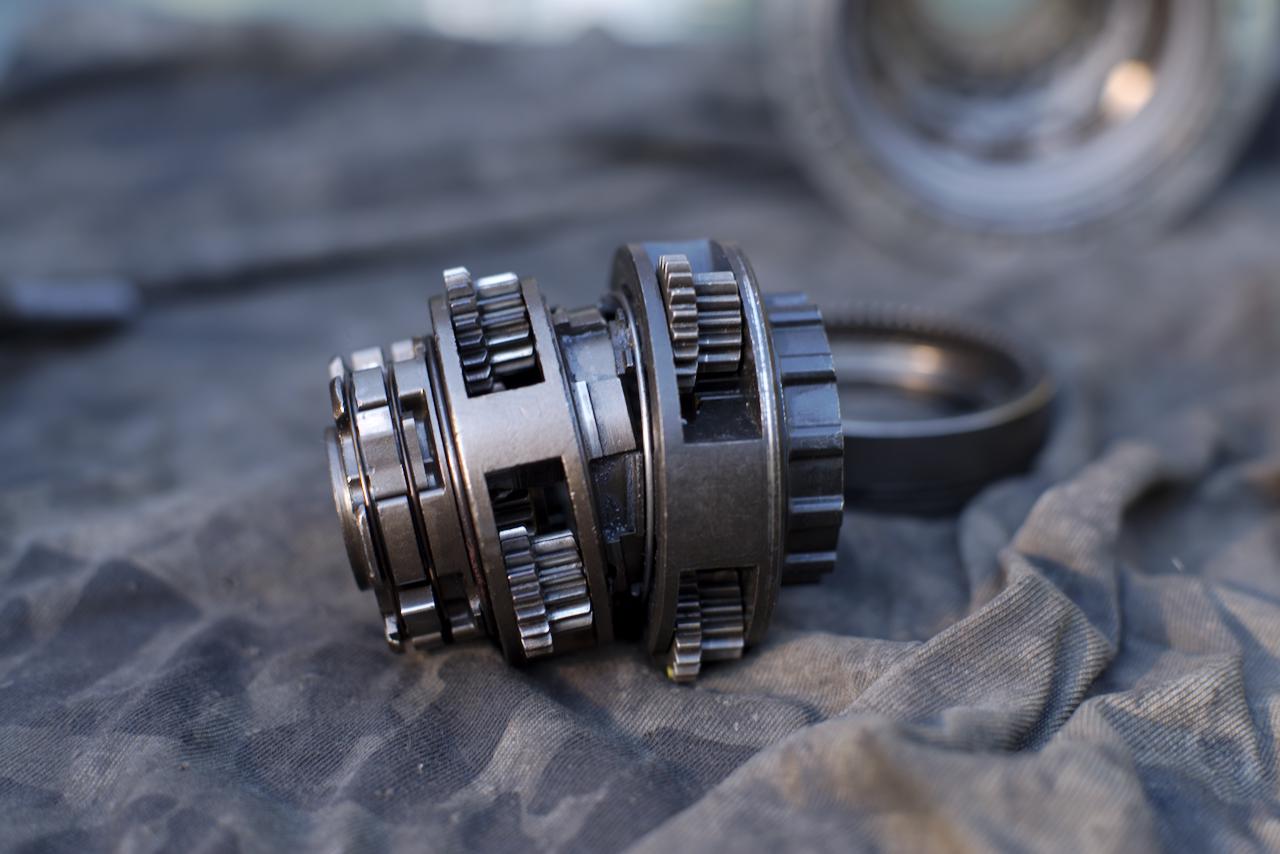
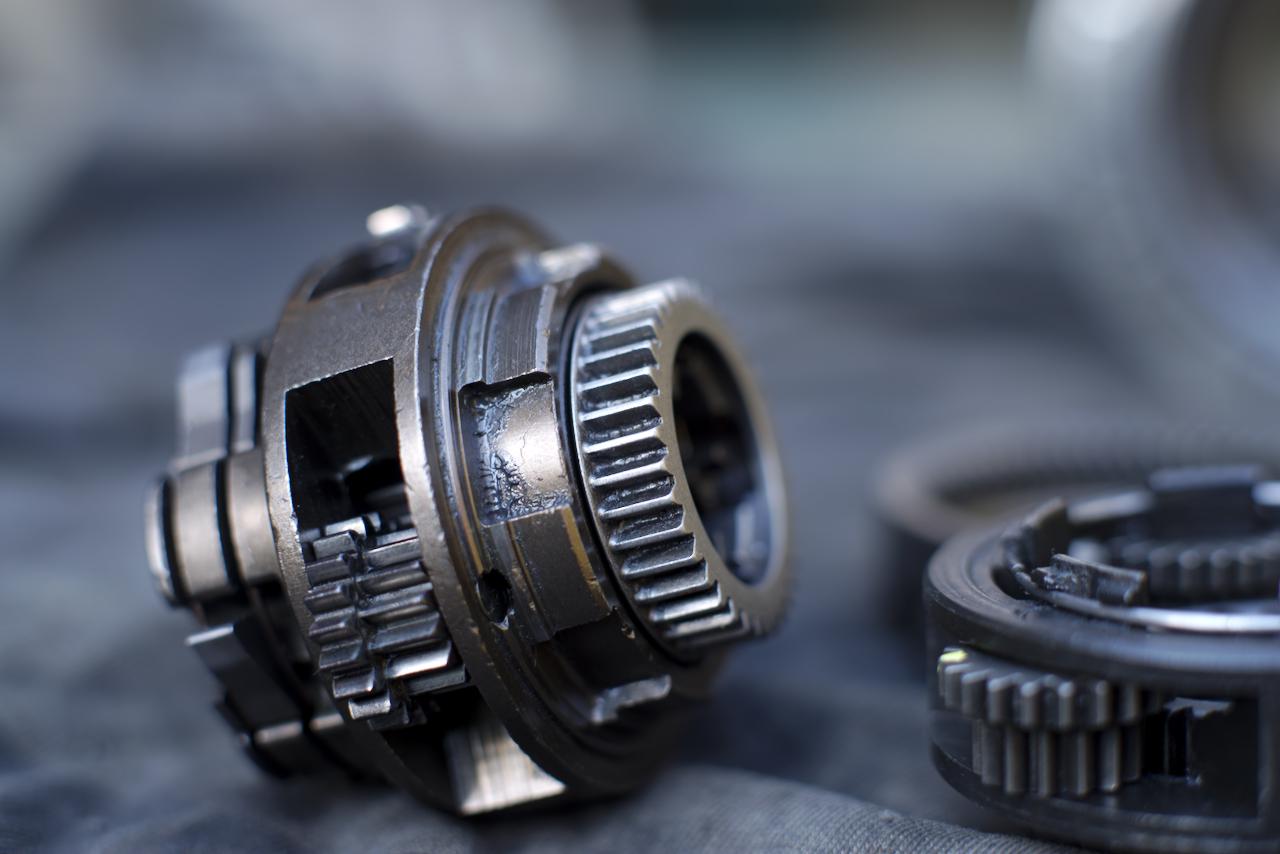
Assembled first stage
First stage. Note that one of the planet pinions has a marked index tooth. Once again, one of the sun gears is held captive, meaning that the hub can easily be partially disassembled.
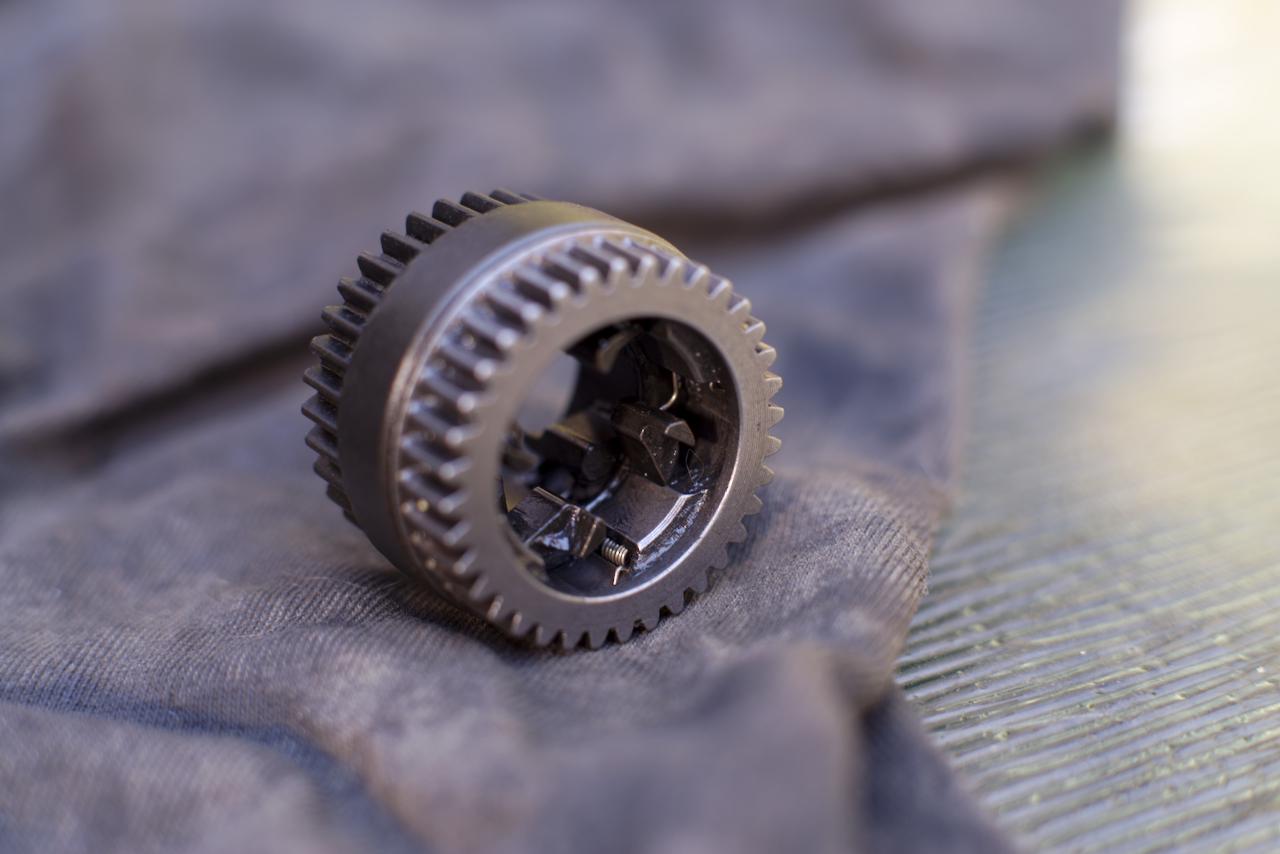
First stage planet carrier. The splines are actually a ratchet, which allows the driver to directly drive the planet carrier (1:1 ratio rather than a reduction gear)
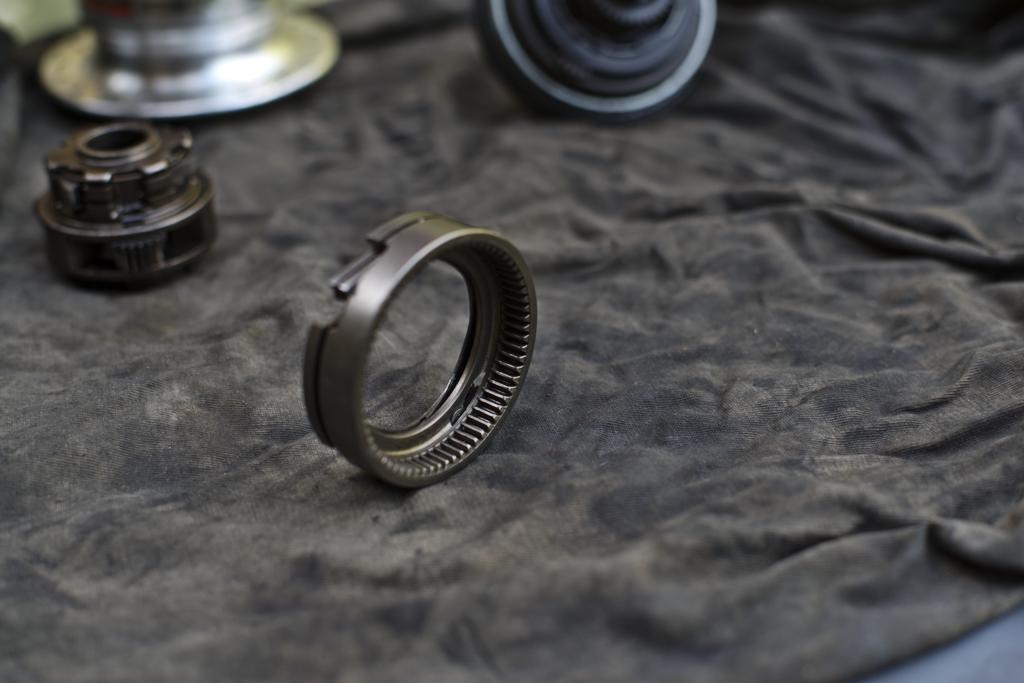
First stage gear ring (around the outside) with the driver inside & behind.
Close up of sun pinion assembly, showing the pawls inside the sun pinions.
Another close up of the second stage planet carrier

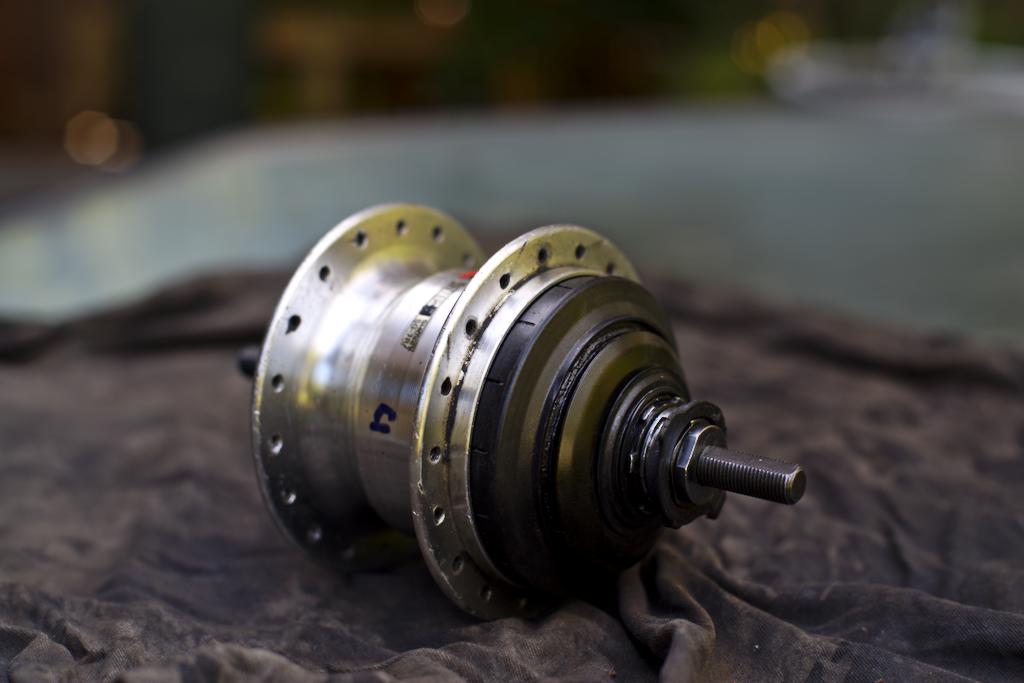
The two planet carriers lock together when assembled, forming effectively a single planet carrier.
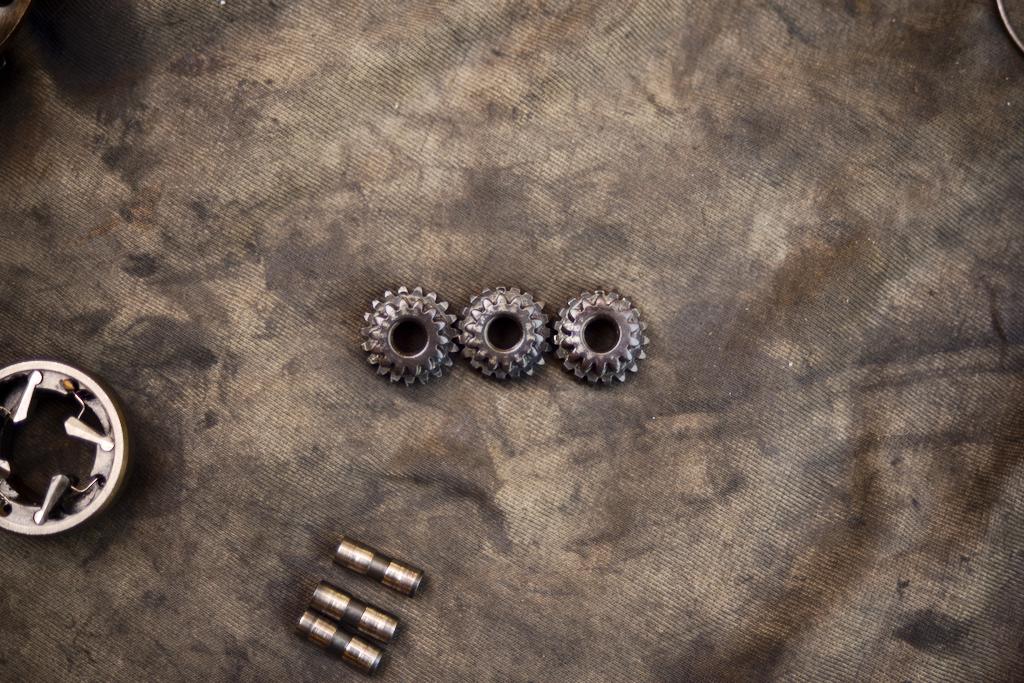
Use a magnet to remove planet pinion shafts.

Parts from the second stage
There are timing marks on these pinions: the timing teeth are at 12 o’clock, and are identified by a tiny indentation.
Some surface abrasion helps distinguish where the pawls should be replaced on the second stage planet carrier
Second stage sun pinion, showing how one end is wider, which keeps it captive as you disassemble the hub. Also note that the pawls can fall out (but not too easily)
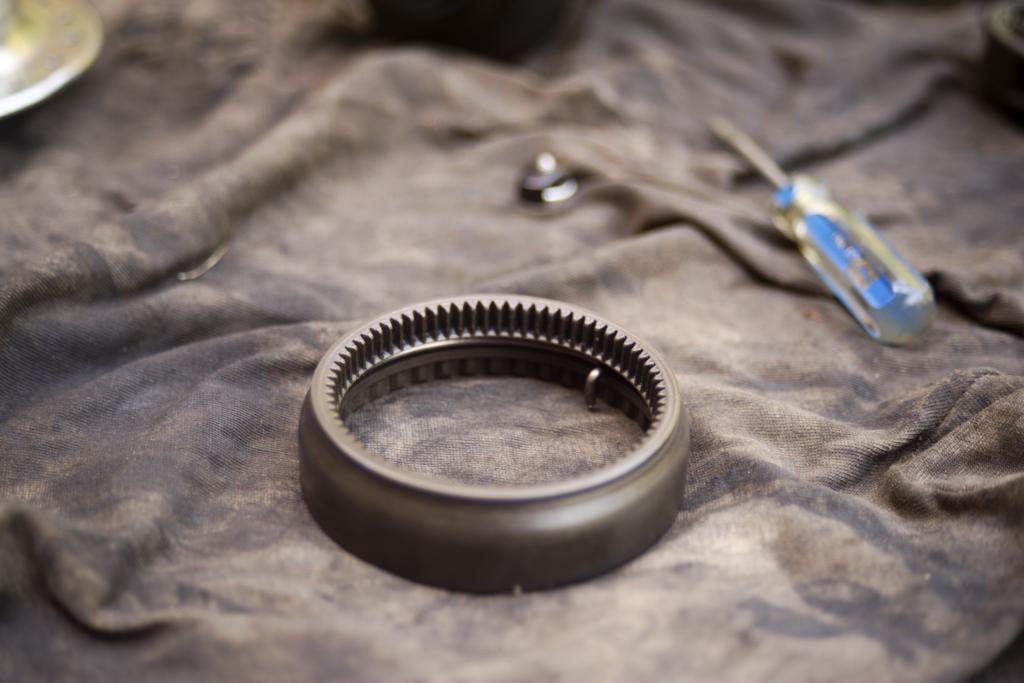
First stage ring gear. Note the weird circlip on the inside that doesn’t seem to serve any purpose.
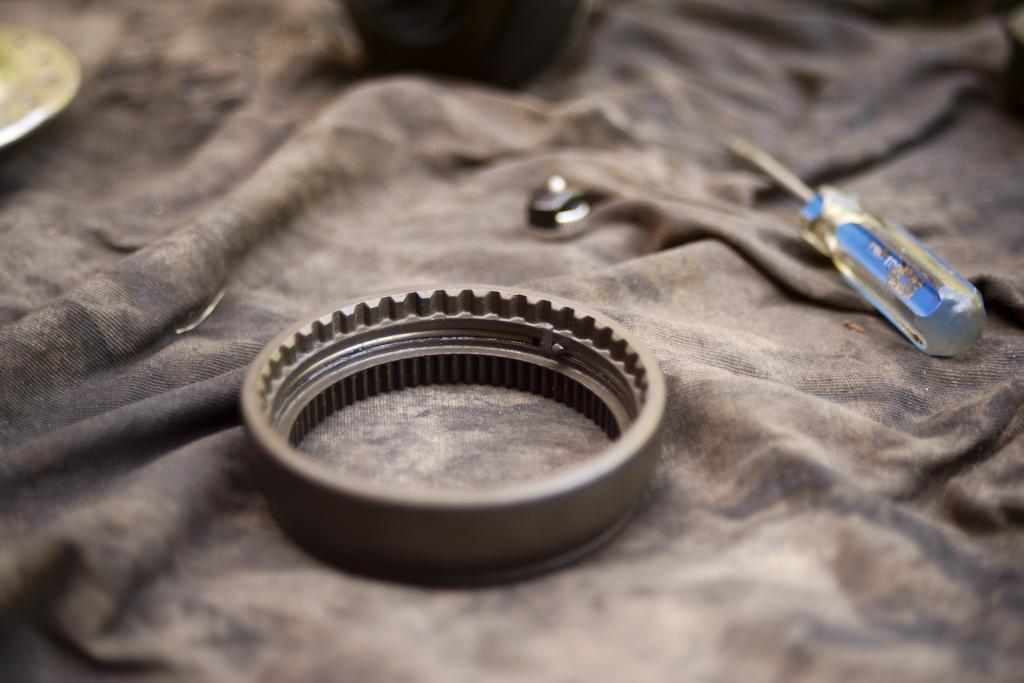
Back of the gear ring, showing a ratchet that is driven by the driver (and the circlip)
The circlip must slot into a particular hole in the driver when reassembled.


scope
This article will cover disassembling and reassembling the major gear assemblies in the hub, but I will not cover the shifting/control assembly. The reason being that the hub that I used was offered by John Harland, and he had indicated that he wanted to use it in a bike at some time in the future. As a result, I didn’t want to disassemble this hub to a point where it may be difficult to reassemble it.
preparation
If your hub is part of a wheel and installed in a bicycle (the one that John brought to me wasn’t) then you will need to remove the wheel from the bike, and ideally also remove the sprocket from the hub. After that you must remove the hub internals by undoing the left hand bearings. The internals should then pop out of the hub shell (the Shimano ones aren’t screwed in like Sturmey Archers were)
There are no special purpose tools required, although a small magnet is useful, as are screwdrivers (various sizes) for removing the main circlip, and a pair of tweezers or needle nose pliers to remove pawl springs (if applicable, eg if you need to replace a broken pawl).
disassembly
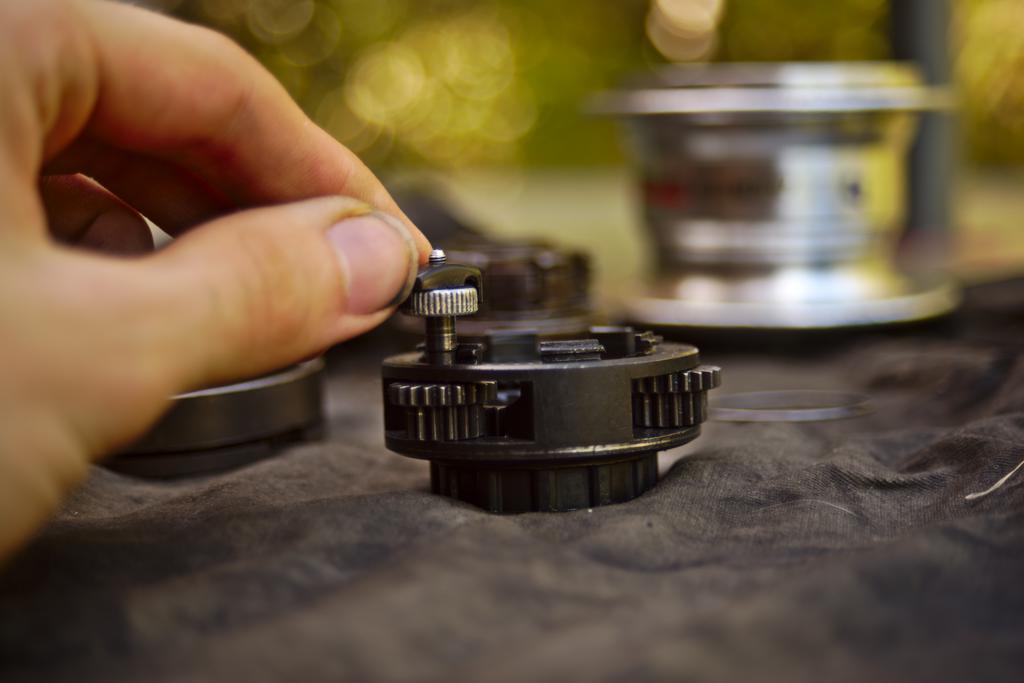
As with Shimano’s 8 speed hub, disassembly is quite simple: the internals are held together by a single massive C clip (or Jesus clip as many people refer to them). After removing that, there are several “modules” that can be removed by hand.
Note that the compound planet gears have to be correctly aligned in order for the hub to work. However, when removed from the internal assembly, the planet cage halves each have a sun gear held captive, which will preserve the alignment. Provided you don’t disassemble these two modules you should be able to just slot everything back together like Leggo.
I refer to the planet cage modules as “planet cage halves” because they only separate for the purpose of assembling the hub. When in use, they are joined by a spline interface and rotate as one part.
An interesting difference from most other hub gears that I’m aware of is that Shimano designed this with 3 of the 4 sun gears having pawls inside the sun gear rather than pawls on the axle. I’m not convinced this is a good design; it strikes me that the pawls are very delicate (in order that the sun gear is adequately strong), and replacing a broken pawl would be incredibly fiddly, much more so than if the pawls were mounted on the axle.
Disassembling the planet cage modules isn’t recommended unless it’s necessary (eg to replace a damaged gear) due to the rather fiddly process of reassembling the modules with the planet gears correctly aligned.
If you must disassemble, you need to remove the planet cage shafts first by removing the snap rings at one end (and also the output pawls for the second stage module). The shafts are best pulled out with a magnet (I used the sensor magnet from a cycle computer). Then you can separate the planet gears and the captive sun gears from both modules.
Before you remove the planet gear shafts, take note of the timing marks. They can be very hard to see, but with this particular hub gear the marked index teeth should mesh simultaneously with the sun gear (or gear ring).
timing the planet gears
Compound planet gears have to be correctly aligned relative to each other in order for the gear system to work freely. With this hub, each of the planet cage modules were very similar to reassemble. The technique that I found worked for me was to start by placing the captive sun gear in the planet cage, all resting on the bench. Then I arranged the three planet gears around the sun gear with three constraints:
- Index teeth facing outwards. I lined them up carefully by eye, and used the number of teeth on either side of the index tooth as a guide.
- Planet gears meshed with the sun gear
- Lined up with the hole for the planet gear shaft.
With the first stage module I was able to just lower the shafts into place (securing the planet gears) and then attach the snap ring to hold the module together.
The second stage module was more tricky because the shafts had to be inserted from underneath. What I found worked was to carefully turn the module over after placing the planet gears in mesh with the sun gear (holding the planet gears in place gently) and then drop the shafts in. If the planet gears move a little it’s ok, provided they stay meshed with the sun gear. If they stay meshed they will keep the correct alignment.
You can check the timing on each module by assembling it with the ring gear and the non captive sun gear. The ring gear should turn freely. If it’s locked up, or if you can’t get the parts to mesh together, check that the timing marks are correctly aligned (all pointing outwards at the same time). If not, take it apart again and repeat the above steps. Don’t force the parts together.
reassembly
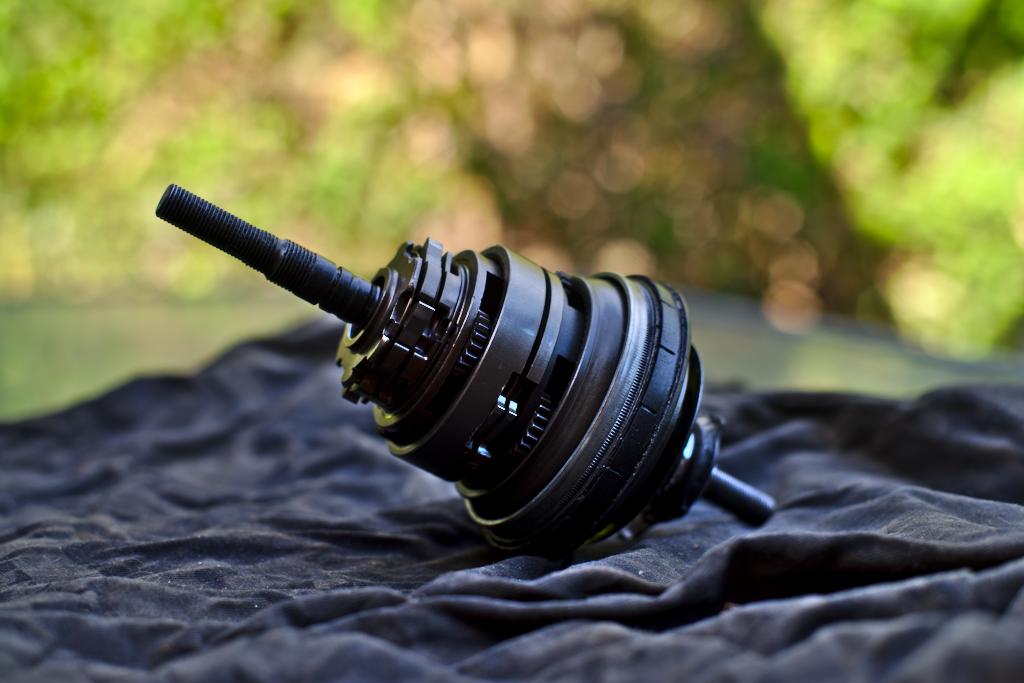
With the planet gears aligned (or if you didn’t need to disassemble them) reassembling the modules is very straight forward; simply put them all back onto the axle as you removed them. Note that the first stage ring gear has a snap ring inside it, and the end of it slots into a particular hole in the driver (although I can’t work out what the purpose of it is). Everything else should simply slot back together.
this is not a comment, but a question I hope you will answer.
My hub doesn’t suply any “pull back” when trying to change gear. It can’t be a problem with the cable because the wheel is taken out of the frame.
The actual shifter on the hub, the ring with 6 teeth, just in front of the sprocket, can be rotated to the left and right at an angle of a little less than 90 degrees but without any resistance at all.
Could you please inform me what is wrong here?
kind regards,
and greeting from Amsterdam
Leo
The hub has a return spring in the axle/control mechanism, which I would think has either broken or come away from where it’s meant to sit.
The bad news is that Shimano definitely don’t sell the spring on its own. The control mechanism in the axle is complicated and very fiddly to strip and rebuild; a bike shop would replace the hub internals mostly because the time (labour cost) would be more than the cost of a new hub.